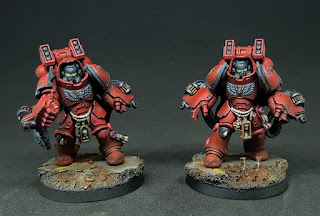
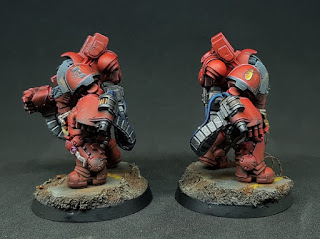
Doesn't seem much but I never add more than a squad and half painted for each army for many years, so it's quite a milestone for me :)
A few pointers concerning the kit, it's possible to build them almost completely and keep the head separate for ease of painting, you just need to cut the little peg under the head, so you can tuck them in their little hood.
Keep the ammunition feed in two pieces was a mistake, glue both side and then glue them in, I didn't glue to backpack to make it easier to paint.
Apart from theses littles things, the kit is really nice with a few options, cleaning the mould line on all the cables was a massive pain though.
Without further ado, here is the result!
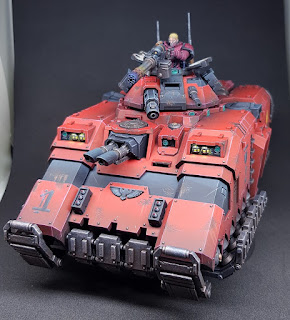
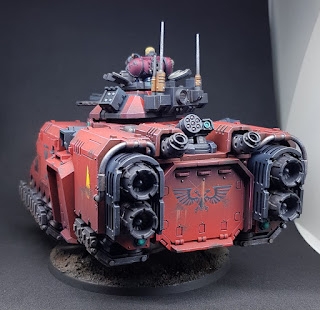
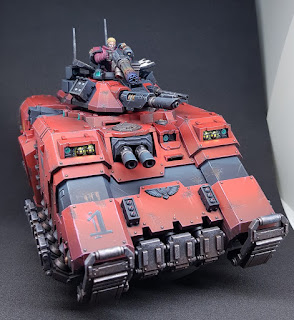
[Français] Et voilà, la finalisation de mes 1000pts de primaris (à 25pts près), la dernière escouade en date avec ces aggressors qui représente la garde rapprochée de mon capitaine et qui l'accompagne dans le repulsor.
Jolie kit avec un certain nombres d'options; pour ceux qui se demandent, il est possible de monter l'ensemble de l'armure et de garder la tête à part, il suffit de couper le petit pivot sous la tête, il est possible de la glisser dans la zone réservée après peinture.
Évitez de garder les chaines de munitions en deux parties, c'est une erreur que j'ai fait ce qui a rendu le collage final plus qu'ennuyeux....
Knight of the Chalice aggressors squad
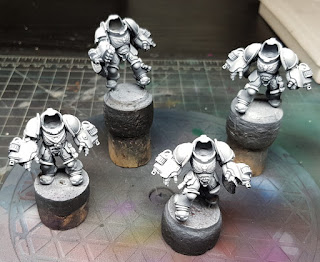
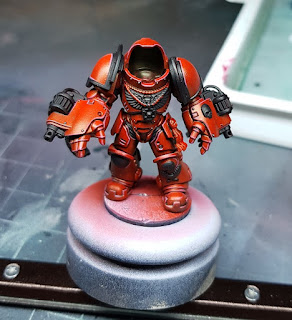
Before painting to give you an idea of the different parts, no heads, no backpacks.
Oh, if you're wondering why I have squad of 4, I had a pretty big miscast on my original box and gw was kind enough to send me a new one, kudos to them!
Red Tutorial - Tuto sur le rouge
Quite a few people asked me about my recipe for the red, when I choose my scheme, the idea was to have very simple steps to paint it so I could do a whole army this way.
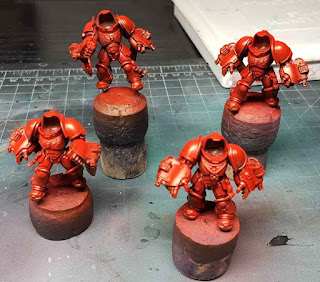
I put theses littles pictures together to show the process, I don't think the tutorial need to be as precise as the other ones since there's nothing much to it really.
Bon nombres de personnes m'ont demandés la recette pour le rouge, l'idée de base de cette armée était de pouvoir réaliser la couche de base à grande échelle et de façon rapide afin d'imaginer avoir une armée peinte un jour, voici donc un petit tuto rapide sur la façon de procéder pour avoir ce rouge bien flashy. (Pour être honnête, il a été fait avec les images à disposition, il n'est pas forcement aussi bien ficeler que les autres)
1. The first step and what I usually do with all my minis is prime them with chaos black, which is thus far the best basecoat spray for me.
I will use preshading on this mini, this technique can be quite helpful to make the volume pop and give you a rough idea on where to put your highlight.
Give it a zenithal spray with white, to make it more interesting, I also spray with a 30° angle from the top, otherwise the legs will never receive any highlight from the white.
Give it a zenithal spray with white, to make it more interesting, I also spray with a 30° angle from the top, otherwise the legs will never receive any highlight from the white.
You can use a rattle can or an airbrush, all my intercessor where done using a rattle can and I used the airbrush for my lieutenant and captain, it's really up to you.
La 1ère étape consiste à sous-coucher la figurine en noir, j'utilise le spray gw qui reste pour moi la référence parmi les différents produits testés.
Pour ces figurines, j'utilise la technique du "preshading" (pré assombrissement pour les bons francophones mais ce n'est pas terrible comme termes...), cela consiste à sous-coucher une figurine en noir et appliquer un voile blanc en deuxième couche pour marquer les volumes.
Cette couche pour être appliqué au spray ou à l’aérographe à choix, le résultat à l'aéro sera un peu plus fin mais rien de transcendant non plus, pour référence, les intercessors sont fait à la bombe et les lieutenants et capitaine à l'aéro.
J'applique cette couche de façon zénithal en ajoutant un petit angle de maximum 30° pour donner plus d'intérêt et une meilleure lecture. Petit effet artistique, sinon la tête sera blanche et les jambes noires.
2. For the second step, I use an airbrush to spray the armour with daler & rowney flame red ink which is an acrylic ink. I don't even dilute it, to give you an idea of my laziness...
You just need to give it a few light coats to keep the transition you have between the black and white, the white undercoat will make the red pop.
You don't need an airbrush for the step, it just faster to do it this way, if you want to do the same thing by hand, you need to do a few diluted coats to keep the original contrast.
Keep in mind that red is heavily dependent on the colour next to it, if you have really bright colours adjacent, it will make it less vibrant.
If everything went correctly, you should have a nice subtle gradient on the red. It's really shiny for the moment but the varnish at end will dull the effect.
La seconde étape, j'utilise l'aérographe pour faire de couches délicates de rouge avec de l'encre acrylique daler & rowner flame red ink, je suis tellement une flemme que je ne la dilue même pas...
L'idée est de faire plusieurs couches fines pour laisser apparaître les transitions et donner un effet de dégradé sans passer des heures à le faire manuellement.
L'aérographe n'est pas une nécessité mais il simplifie le procédé, si vous souhaitez le faire au pinceau, le plus simple est de faire de fines couches diluées jusqu'à atteindre la couleur voulue.
Il intéressant de garder en tête que le rouge est également dépendant des couleurs adjacentes, s'il est entouré de couleurs criardes, celui-ci va se "perdre" dans la masse, entouré de couleurs plus neutre, il va ressortir.
Le résultat est très brillant pour le moment, mais cet effet sera atténué par l'étape final de vernis.
3. To make it easier to read, I painted all the black part in... black (badum); I also use a mix of red ink and black ink to mark all the joints and creases in the armour, the ink being more fluid make it easier to apply.
Easy step, just take your time to not make some marks on the red.
Pour faciliter la lecture et la peinture, je peins tous les parties qui seront noirs en... noir (tadaa); j'utilise un mélange d'encre rouge et d'encre noir pour marquer les creux et joints de l'armure, la fluidité de l'encre facilite cette application.
Prenez votre temps pour cette étape afin de ne pas dépasser sur les parties rouges.
4. Last step is to highlight the edges of the armour panels following the zenithal highlight, I am using a mix of 50/50 red ink and white, that part can be a bit tedious but It really make the armour pop.
Sometimes I do this step in two passes, adding more white and doing smaller line to finish it.
If the transition is to strong, just glaze some red ink to smooth it out.
And boom, flashy red is done!
Les dernières étapes consistent à éclaircir les arêtes de l'armure en suivant la lumière zénithale, j'utilise un mix de 50/50 encre rouge et blanc.
Je fais parfois cette étape en deux fois, si mon mélange est trop foncé, j'ajoute simplement un peu plus de blanc et reprend des éclaircissements plus fins. Si la transition est trop violente ou le mélange trop clair, je fais des petits glacis d'encre rouge pour affiner la transition. C'est probablement l'étape la plus longue, mais c'est celle qui va donner la définition de l'armure et ces contours.
Et voilà, un rouge bien flashy en 4 étapes !
Plusieurs articles sont prévus sur des tests de matos, des présentations (des nighthaunts!) et d'autres tutos, il faut juste que je trouve du temps pour les écrire, ceci me prenant un peu plus temps que ce que j'envisageais à la base.
N'hésitez pas à me faire part de vos retours et de choses que vous souhaitez discuter !
I have quite a few things planned for the next few articles, showcase (expect to see some nighthaunts!), review and some tutorials, I just need to find the time to write everything, since theses articles take quite some time to write!
Cheers
Anamnesis


