20 Dec 2019

[Tutorial] Stormcast snowy base


Hello again!

So, this will probably be the last article this year, a few people were curious about my snowy base on my stormcast so here is a new tutorial similar to the nighthaunt one I did a few months ago (link at the end of this post), how time flies!
Voici donc le dernier article de l’année, plusieurs personnes étaient curieuses sur mes socles de stormcast, voici donc un tuto similaire à celui des nighthaunt sur des socles enneigés (lien en fin d'article).

Nothing too fancy, Stormcast are already quite tall and I didn't want to add height with cork or something similar (except for heroes and monster, you may see it next year...), so the base is simple to prepare and quick. 
Rien de très spécial, l’objectif était de faire des socles simples et rapides et ne pas trop les surélever vu la taille des stormcast.

Anamnesis studio

What you need – le matos:

  • Sand paper / papier de verre
  • Some base / des socles
  • Few pieces of slate or pine bark / des morceaux d’écorces ou d’ardoises
  • Some snow, I really like Krycell precision ice and snow (find my full review here) / de la neige, je suis très partial sur neige de chez Krycell pour son résultat (le test complet ici)
  • Resin, I’m using uv resin because it’s faster, but normal resin or even a few layers of pva glue should do the trick / de la résine, j’utilise la résine uv pour la rapidité, mais de la résine normale ou même de la colle blanche fais l’affaire
  • Sand and dirt / du sable et de la terre


Anamnesis studio
I won’t go too much into detail for the preparation, there isn’t much to it and a few steps a quite similar with this tutorial on my nighthaunt base.
In short, sand the base, glue a few pieces of barks or slate, add some sand and dirt around the bark and you’re good to go!
Don’t forget to prime it, the bark sucks up the paint.
Je ne vais pas trop rentrer dans le détail de préparation que vous pouvez retrouver dans le tuto nighthaunt.
Pour faire simple, je ponce le socle, je colle des bouts d’écorce ou ardoise et j’ajoute du sable autour de l’écorce, un petit crâne ou deux et c’est bon ! N'oubliez pas la sous-couche l'écorce absorbe énormément la peinture.
 Anamnesis studio

Now we’re ready to paint it! 

Passons à la peinture!


As you may have found if you follow my tutorials, I really like using a sponge for texturing, this one is no different.
Dans la continuité de mes autres tutos, j’utilise beaucoup des éponges pour faire mes textures.

Paint used / peintures utilisées:

  • Kimera Kolors Magenta
  • KK Phtalo green
  • KK White
  • Liquitex magenta quinacridone ink
  • Vallejo Dark sea blue
  • S75 Caspian blue
  • S75 Artic blue

 Anamnesis studio

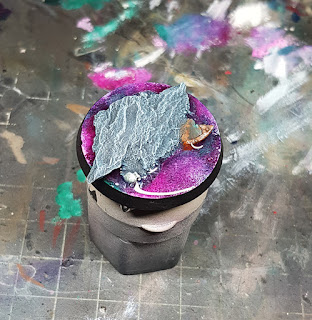
After the black primer step, I take some magenta and sponge it around the bark pieces to colour where the ice will be, trying to leave some black spots for the next colour.
Après la sous couche noir, j’utilise l’éponge trempé dans du magenta pour marquer les zones de glace, je laisse intentionnellement des parties noires pour la seconde couleur.
 Anamnesis studio

When it’s still wet and without cleaning the sponge, I take some white and sponge on my magenta to create a lighter tone.
Quand c’est encore humide et sans rincer l’éponge, j’utilise un peu de blanc pour venir éclaircir le magenta.
Anamnesis studioAnamnesis studio

I repeat this process, with phtalo green then white on the part I left black to create variety.
The mix between magenta and green result in a nice blue-purple tone.
Je recommence le processus avec du phtalo green puis du blanc pour venir créer de la variété, le mélange des deux teintes crée un joli violet pâle.
Anamnesis studio
Anamnesis studio


Base the bark and sand with dark sea blue.
L’écorce et le sable reçoivent une couche de dark sea blue.
Anamnesis studio

Drybrush the rock with Caspian blue.
Le caillou est brossé à sec avec du caspian blue.
 Anamnesis studio

Again, with artic blue.
On recommence avec de l’artic blue cette fois.
Anamnesis studio

And finish with a light drybrush of white.
Et je fini avec un léger brossage à sec de blanc.
Anamnesis studio

To bring back vibrancy, I glazed magenta and phtalo green on the ice part.
Paint the rime and the few bits added and you’re ready for the resin.
Pour forcer le contraste, je fais des glacis de magenta et vert sur les parties glacées.
Je peins les bords du socle et les petits bits supplémentaires, et le socle est prêt pour la résine.
Anamnesis studio

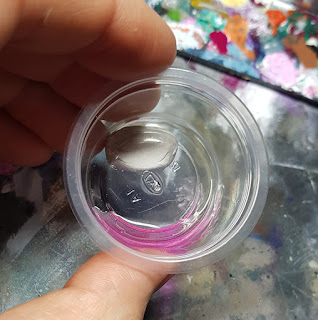
Using uv resin, I add a few droplets of magenta ink to tint the resin but keeping is transparent.
Apply the resin on the flat part and use a uv torch to dry it.
Je mélange une pointe d’encre magenta à ma résine uv pour la teinter légèrement et je la répartis sur les zones plates du socle. Je la fais durcir à l’aide d’une lampe uv.
Anamnesis studioAnamnesis studio

When I properly cured, gently drybrush pure white on the ice, to make it frosted.
Quand la résine est bien sèche, je fais un léger brossage à sec de blanc pour créer l’effet de givre qui donne de la profondeur.
Anamnesis studio

You can leave it as it is, or you can add snow and a few tufts to finish it. I won’t go again on the process, but you can find all the step necessary here!
Vous pouvez laisser le socle comme ça ou ajouter de la neige ou même des touffes d'herbes, je ne décris pas le procéder plus en détail mais vous pouvez le retrouver ici !
  
Joyeuses fêtes à tous !
Cheers and happy holidays!
Anamnesis

4 Dec 2019

[Tutorial] How to paint wood grain


Back on time, precisely because I didn't give any timeline 🙈
Me revoilà avec un nouvel article, comme prévu ! (Pour une fois…)

Last time you saw my first Sequitor painted and I know a few people were curious about the "overworked" wood grain shield; time to debunk this myth, because it's quick and easy to do.
I'll give you the main process for my Sequitor and a way to work the effect further like I did on my conversion of Neave last year.
La dernière fois, vous avez pu voir mon 1er Sequitor peins, plusieurs personne était curieuse sur la peinture de l’intérieur du bouclier, détail débile typique qui se voit à peine mais que je ne peux pas m’empêcher de peindre. Voici donc un petit tuto pour l’effet bois hyper rapide et dont l’effet est convaincant, avec un petit round bonus pour le pousser un peu plus loin, visible sur le bouclier de Neave que j’ai peint l’année dernière.

Anamnesis studio
You don't see much but still visible!


Quick list of the paint I used, you can of course change the colour used for different kind of wood, it's just what I used on this model (I let you experiment but highlighting with grey can produce some cool effect, just saying 😉).
Comme toujours, une rapide liste des couleurs utilisées pour vous donnez une idée. N’hésiter pas à changer les couleurs pour varier votre type de bois.

Anamnesis studio
GW Rhinox hide 
S75 Bosh chestnut
Vallejo Ivory
S75 Chestnut Ink
Some black / du noir

Anamnesis studio
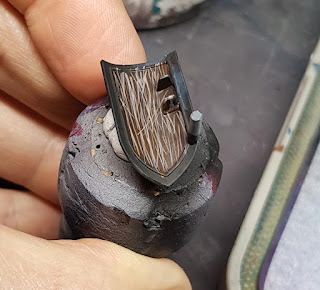
First, give it a nice and smooth coat of Rhinox hide.
On commence par une belle couche de base avec du Rhinox hide, bien lisse.

Anamnesis studio
Now, it’s time to do the “freehand” part, I recommend having a good point on your brush for this. Taking some bosh chestnut, I draw some line at random in more or less, the same direction, this will represent the vein of the wood. Don’t draw all the line from beginning to end, some variation will go a long way to sell the effect.
C’est le moment de commencer le dessin à proprement parler, je recommande d’avoir une bonne pointe sur son pinceau, le process en est facilité. Je dessine des lignes de longueurs et épaisseurs différentes avec du bosh chestnut, en gardant une direction générale, ceci afin de réaliser les veines du bois. Pour les plus courageux, vous pouvez même dessiner les nœuds du bois pour vos généraux ou figs d’exposition, ça donne toujours un petit cachet supplémentaire.

Anamnesis studio
Next, I mix bosh chestnut with ivory in 50/50 ratio and draw more line again at random to give different variety of veins. Don’t follow the precedent step, but make some new lines instead, this will trick you brain into thinking there is different depth on a flat surface.
Je continue avec un mix 50/50 d’ivoire et bosh chestnut en faisant à nouveau des lignes différentes toujours dans le même sens. J’essaie de ne pas trop repasser sur mes lignes précédentes afin de créer un effet de profondeur en trompe l’œil.

Anamnesis studio
Finish it with an even coat of chestnut ink on the whole surface. Tadaaa wood grain in minutes!
If the result is too shiny for you, apply a thin layer of matt varnish to tone it down.
On finit avec une jolie couche d’encore Chestnut sur l’ensemble de la surface, ce qui va unifier la teinte et lui donner un aspect de bois lustré. Si le résultat est trop brillant, un peu de vernis mat permet d’atténuer la brillance.
Et voilà, en prenant mon temps, j’ai dû mettre 10-15 minutes sur le bouclier avec les photos c’est donc très rapide à faire.

Anamnesis studio
Bonus round, if you want to give the impression of wooden plank, just add parallel line of black to mark the plank, highlight the upper edge to give this 3d effect and voila!
(N.B., I find easier to mark the plank after the main process of drawing instead of marking the plank and painting in between the line after ymmv)
Round bonus, si vous voulez donner l’impression de planche de bois, ajouter des lignes parallèles avec du noir afin de différencier les planches, éclaircissez l’arrête supérieurs de ces planches pour donner l’effet 3d et c’est fini !
(N.B. Je trouves plus facile de définir les planches après avoir fait le gros du travail plutôt que l’inverse, mais ceci peut être propre à chacun.)

Until next time…
Anamnesis
21 Nov 2019

[Showcase] General hobby update and progress

As you may have noticed, the blog was a bit quiet for the last few weeks again, I had a few things planned but I wasn't really in writing mood.
Being frustrated with my Sylvaneth didn't help my hobby mojo either, but anyway you're not here to read my rambling.

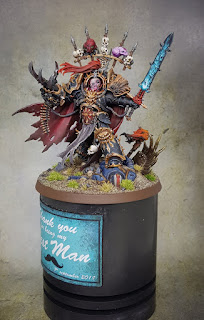
First thing first, here the special project I was working tirelessly before the wedding which was a gift for my best man.

Anamnesis studio
Anamnesis studio
Anamnesis studio
Anamnesis studio
Anamnesis studio
Anamnesis studio
Anamnesis studio
Anamnesis studio

This was a first time doing a label, interesting stuff... For the curious I've been following sprocket small world tutorial, feel free to check it out! Don't expect to see more chaos stuff, this was a one-off 💀
I admit, the kit is quite awesome and very well thought! I was a bit in a rush to paint this big guy, but I still tried to push the painting and respecting my best man painting scheme.

I also had some fun converting a chaplain for my blood angels, we don't really play 40k at the moment, as we are not big fan of the rule and we enjoy AoS more, but I still love my little red marine.
Anamnesis studio

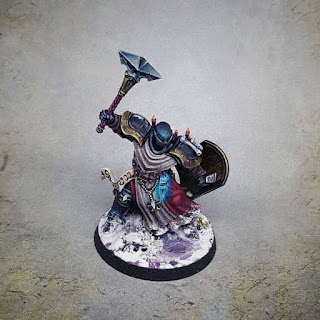
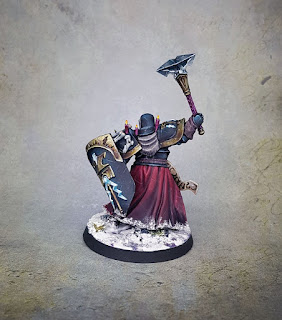
Though the latest news is I acquired a few stormcast and being impressed/inspired/awed by Veillotron army on his twitter account, I wanted to do something similar for a long time.

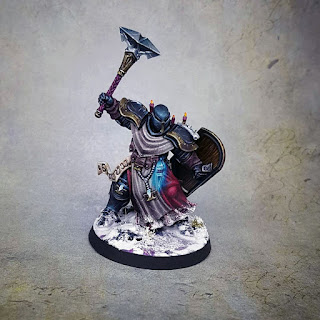
Pulling inspiration from his conversion, the conversion on blog des kouzs and videogame like dark souls and diablo here the first guy on my version of the Anvil of the Heldenhammer.

Anamnesis studio
Anamnesis studio
Anamnesis studio
Anamnesis studio

The next tutorial in the making is quick one on painting freehand wood as you can see on the inside of the shield. The rest will probably follow as I had a few request on my Twitter or Instagram 😊

And that's all for today!
Until next time
Anamnesis

10 Oct 2019

[Showcase] Sylvaneth Tree revenants

Alright wedding done, honeymoon was a treat, we can now go back to regular schedule after the craziness of the last few months.

There're still a few things I've finished and need to show but let's start first with a unit I was really looking forward to paint!

The "mighty" tree revenants! Mighty being a strong word since they do tend to die to a stiff breeze on the battlefield.

I started with a quick squad of fives, the point was to find a good balance between speed and result.
You can imagine, I was really dreading the blade as that's usually the longest part to paint.

The squad in all its glory
The skin recipe was tweaked on them since I didn't really have the time to think too much about it on the Arch revenant with the deadline for everchosen. 
I was supposed to do a tutorial on the skin, but I admit, I totally forgot this, soooo, next time?

The leader

Happy piper

George the standard bearer


Seeing the result, I'm really happy with the result, the standard is probably the coolest NMM I've done so far, but I really need to think twice if I want a second unit 😅

I still thinking about highlighting the black, but I'm not sure if it's worth it.

Expect a few more showcase next!

Happy painting !
Anamnesis