13 Dec 2018

[Tutorial] Painting human face

Old tutorial I made, but you may find usefull tips in there, enjoy!

Un vieux tuto réalisé il y a un peu plus d'une année, mais c'est toujours valable :)

As an introduction, I’m not always using the same colours mostly because I think you should have some difference in skin tone in your army and that's why normally I don't keep track of my skin "recipe".
Skin is also a lot of back and forth the correct slight mistake and stuff.

Also keep in mind those photos are big and it looks pretty bad this close, the effect is totally different from arm length


Pour information, je ne note généralement pas mes recettes pour la peau trouvant de l'intérêt dans la diversité à ce niveau.
Je fais régulièrement des petites retouches au fur et à mesure de l'avancement et de l'effet recherché.

Garder également en tête que les photos sont énormes par rapport à la fig et l'effet est assez moche d'aussi près, l'impression à distance de bras est totalement différente.

1. I start undercoating the face in black then I spray white on top to make a quick mock-up of light and shadow.

Je commence par sous-coucher la tête en noir avant de faire un second passage zénithal en blanc assez prononcé pour me faire un pré-ombrage rapide.
2. I apply an even coat of Scale75 Pale skin on all the skin part, and quickly wash the mouth part with a mix of bright red (in this mayhem red form S75) and black 60/40
Je fais ma couche de base avec du Scale75 Pale skin sur l'ensemble de la peau en plusieurs couches fines, j'en profite pour rapidement faire un petit wash dans la bouche avec un mix de rouge et noir 60/40 (rouge S75 Mayhem red, un rouge bien vif).
3. I start shading the skin with light glaze of S75 basic flesh pulling the brush from the light part to the darkest part going lower and lower. This will blend the skin smoothly and add a nice gradient. That where you can see I made a mistake and washed the eyes with too much black instead of blue, I will correct this latter.
Je commence à dégrader la peau en faisant des glacis dilués de scale75 basic flesh, en tirant ma peinture de ma zone claire à ma zone d'ombre en diminuant la zone à chaque fois. De cette façon, vous aurez un joli dégradé bien propre.
J'ai fait une bêtise en faisant un wash de noir sur les yeux un peu trop fort mais je rattraperai ça par la suite.
4. I define the crease of the face with glaze of S75 Indian shadow mixed with basic flesh to add more contrast and provide a good lecture of the face, concentrating always on the part I darkened on step 3 going lower and lower again.
Je continue à définir les ombres et creux en continuant à faire des glacis avec mon basic flesh mélangé avec un peu de s75 indian shadow, afin d'accentuer les contrastes et rendre les volumes plus lisibles. Je continue à diminuer la zone au fur et à mesure de mes glacis.
5. I mark only the deepest shadow with very light glaze of S75 african shadow.
Je marque les ombres les plus profondes avec un très léger glacis de s75 african shadow.
6. I highlight the skin with my Pale flesh reclaiming the zone where I’ve been to heavy with shadow. I also paint the lower lip with a mix of basic flesh and red 50/50.
Je commence à éclaircir ma peau avec ma couleur de base (pale flesh) afin de reprendre les zones trop assombries, j'en profite pour peindre la lèvre inférieure avec un mix de pale flesh et de rouge 50/50.
7. Highlight the lower lips by adding a bit of white to your mix. And highlighted the skin a tiny bit more on the most exposed part (like tip of the nose) with pale flesh and white mixed.
J'éclaircie la lèvre inférieure en ajoutant un peu de blanc à mon mélange précédent, j'en profite pour ajouter un ultime éclaircissement les parties les plus exposées de la peau, tel que bout du nez, pommette, paupières inférieures avec du pale flesh mélangé à du blanc.
8. Adding more white to your mix, trace some vertical lines to highlight the lower lips on last time to make it more lifelike. I also painted the teeth white before adding fine line of black to mark the limit between teeth. (You better off painting the teeth in off-white and not pure white like I did, it looks more naturel less freedent gum advert...)
Afin de finir la lèvre inférieure, je rajoute du blanc à mon mélange et traces des petites lignes verticales pour simuler la texture d'une lèvre usée par le soleil, les dents sont peintes en blanc et je trace des dents avec des fins traits de noirs. (Il est préférable de peindre les dents en blanc cassé plutôt qu'en blanc pur pour un effet plus réaliste et moins freedent...)
9. After blackening the eye socket with black, I painted the globe with Vallejo deck tan (off-white mostly)
Je peins d'abord les yeux en noir pour les détourer, puis je peins le globe oculaire en blanc cassé, dans ce cas du Vallejo deck tan.

10. Now paint the pupils with pure black but diluted and try to do a small ball shape. To finish the effect, I add a white reflection point in the upper part of the pupils with pure white.
Je peins la pupille en traçant un rond noir au milieu du globe (à adapté en fonction du regard désiré !) et je fini l'effet en ajoutant un point de réflexion sur la partie supérieure de la pupille avec du blanc pur.
11. Now the fun time, to add a bit life to your skin, glaze some navy blue on the lower part of the eyes and some red around the bottom of the nose
Il est temps d'ajouter un peu de vie au visage, on commence par un léger glacis de bleu marine sur la partie basse des yeux et un glacis de rouge à la base et sur la partie basse du nez.
12. Since I was a bit heavy handed with the blue glaze, I highlighted again the bottom eyelid with my mix of white and pale skin and painted the base colour for the hair (which should follow I couldn't finish this part...)
I painted the hair in a light yellow Hikey yellow from Scale 75
Du fait que j'ai été un peu fort sur le glacis bleu vers les yeux, je reprends mon éclaircissement sur la paupière inférieur avec mon mix de blanc et pale skin. Je commence les cheveux en faisant une couche de base de S75 hikey yellow afin de faire des cheveux blond clair déteint par le soleil de Prospero.
13. Shade the whole air insisting on the darkest part with a mix of yellow and s75 chestnut ink, usually in two or three pass adding always more chestnut ink
J'ombre l'ensemble des cheveux en insistant sur les parties que je désire plus sombre avec un mélange de hikey yellow et de s75 chestnut ink, en deux ou trois passages dilués.


14. Time to highlight the air with hikey yellow thinking on where you want you highlight (you can have a look at picture or loreal of similar hair product it's quite interesting!)
Je commence mes éclaircissements avec ma couleur de base en réfléchissant ou placer mes éclaircissements (une bonne référence sont les pubs l'Oréal ou autres produits pour les cheveux ou les contrastes sont très poussés).
15. Finish the smallest highlight with hikey yellow mixed with white concentrating on very small part and following the hair
Je fini les ultimes éclaircissements en marquant de façon singulière les cheveux et pointes avec un mélange de hikey yellow et de blanc.

And you should be done!
Et voilà le résultat ! 
Anamnesis

5 Nov 2018

[Tutorial] Nighthaunt ghosts and clothes

Just in time for Halloween, here is the tutorial for my spooky ghosts! 
Okay, I'm late, like much more than I expected to be honest, uh oh...
Juste à temps pour Halloween, voici le tutoriel sur mes petits fantômes! En fait, non, je suis super à la bourre sur cet article qui était censé sortir pour le 31 octobre, ahem.

A quick reminder, the idea behind my nighthaunt was to be able to paint them quickly to be able to field a fully painted army before 2025. 
I'm using the airbrush to speed up the process, it's not a magical tool by any means, and usually if you're doing one mini at a time it's easier to paint with a brush, but when you're doing 10 miniatures together, you have a nice consistency across all of them. 
Pour rappel, le but de cette armée était de pouvoir les peindre rapidement afin d'avoir une force complètement peinte dans un délai raisonnable.
J'utilise l'aérographe afin de gagner du temps sur la peinture à la chaîne, c'est n'est pas un outil magique et si vous faites une figurine à la fois c'est souvent plus rapide au pinceau. Le gain majeur est la cohérence sur l'ensemble de l'armée, qui n'est pas toujours facile à reproduire au pinceau. 

And if you're interested in airbrushing, there is a nice Kickstarter from Cult of paint of a special serie partnering with harder & steenbeck which is what I consider the best airbrushes running now until the 12th November normally.

The link for the curious, total disclosure, I'm not affiliated with them and gain nothing from this, I just really like this airbrush and think the small tweaks they propose look really good.

Et si l'aérographe vous intéresse, il y a un joli kickstarter de Cult of paint qui propose une version spéciale de l'Infinity de chez Harder & Steenbeck qui est pour moi le meilleurs modèle du marché, à suivre jusqu'au 12 novembre.

Le lien pour les intéressé-e-s ou curieux, pour être totalement transparent, je ne suis pas affilié à eux et je ne gagne rien en échange de ce lien, je suis juste fan de cette aéro et je trouve que les modifications apportent un petit plus bienvenu.

So, to paint spooky ghost and textured clothes you'll need:
Le matos requis:
Anamnesis studio
  • An airbrush* / aérographe (Harder & steenbeck infinity here)
  • A brush with a good point/ pinceau avec une bonne pointe
  • Scale 75 Arbuckles brown
  • S75 Shrapnel red
  • S75 Miskatonic grey
  • S75 Walnut
  • S75 Surfer orc flesh
  • S75 Despair green
*It's optional and you can do it by hand if you don't have one/ C'est aussi faisable au pinceau si vous n'avez pas d'aero


Anamnesis studio
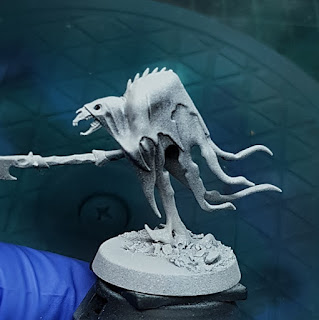
As with most of my painting I start with a black undercoat then spray white with a can zenithally to highlight the main part, it is called preshading. I insist with the white to have a lighter undertone for the airbrush part.
Comme quasiment tous mes projets, je commence par une sous-couche noire avec un voile blanc par-dessus, afin de délimiter rapidement les volumes (preshading pour les intimes). J'insiste un peu plus sur le blanc pour avoir une base bien claire pour le travail à l'aéro.


Anamnesis studio
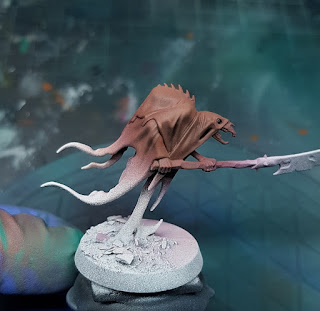
I'll start by doing the cloth part using arbuckles brown as my basecoat, spraying lighter on the highlight part, you want to really cover the shadowy part usually.
Je commence par les tissus avec un premier passage d'arbuckles brown comme couche de base, je n'appuie pas trop sur les parties claires, le but étant de couvrir les ombres principalement.


Anamnesis studio
Next step is to highlight the brown with shrapnel red, following the light spot created by the preshading.
Prochain étape, j'éclaircie le brun avec du shrapnel red en suivant l'éclairage du preshading.


Anamnesis studio
Finish the cloth part by highlighting smaller part with shrapnel red mixed with a bit of miskatonic grey, about 70 red to 30 grey.
Je fini la partie tissu aéro avec un éclaircissement de shrapnel red avec du miskatonic grey (environ 70/30).


Anamnesis studio
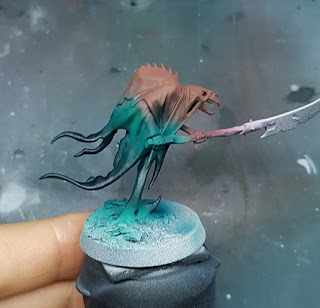
We start the ghostly part now, you'll have to be careful when you spray to not hit the upper part of the cloth where you don't want the ghostly effect. Start spraying surfer orc flesh from the bottom giving a light coat everywhere you don't have brown, try to blend with lighter spray the part between the brown cloth and the ectoplasmic surface.
Don't be afraid to spray a bit on the brown to really have a transition between the two tones.
C'est le moment d'entamer la partie fantomatique, il est important de faire attention sur cette étape à ne pas sprayer toute la partie du tissu déjà travaillée.
J'utilise le surfer orc flesh pour gentiment sprayer les parties basses qui sont encore blanche, j'en profite pour venir gentiment sur la base du tissu brun pour lier les zones et donner cet effet fantomatique de transition.


Anamnesis studio
It's time to shade the green with despair green, this paint is quite transparent, which work in our favour for this. You want to spray the end of ghostly bits to darken them and try to shade the shadow spraying from underneath the mini, if everything goes smoothly you should have something like the picture above. Don't worry too much about it, you can do touch up with a brush after.
C'est le moment d'assombrir le vert avec du despair green. C'est une peinture très transparente et l'utilisation se rapproche plus d'un wash/glacis que d'une peinture standard. L'idée est d'insister sur les extrémités pour les foncer et d'assombrir également les plis en sprayant par en dessous, tout en faisant attention au partie déjà traitées.
Si tous se passe bien, vous devriez avoir un résultat similaire à l'image ci-dessus. Il est toujours possible de rattraper les détails avec un pinceau par la suite.


Anamnesis studio
Continuing now with a brush, I refine the shade with despair green if needed, then highlight the edge of the ghostly part with surfer orc flesh. 
On commence le travail au pinceau, on affine les ombres avec du despair green au besoin et on éclairci les arêtes des parties fantomatiques avec du surfer orc flesh.


Anamnesis studio
Time to texture the cloth, using diluted walnut, I start drawing line in criss-cross on the lightest part of the cloth. You want to simulate texture which I visible on the part where the light hit them. On infantry I do a lighter criss-cross and take more times on heroes and such.
C'est le moment de créer l'effet de texture, avec du walnut dilué, je trace des lignes croisées sur les parties exposées du tissu. L'idée est de simulé la structure d'un tissu visible sur les parties en lumière principalement. Sur les unités, je fais ce travail assez rapidement et grossièrement, tandis que je me prends mon temps sur les héros.


Anamnesis studio
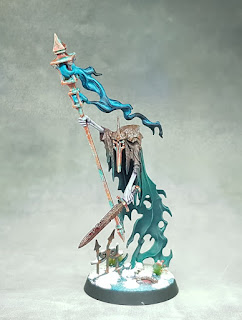
To finish the effect, redo some criss-cross with miskatonic grey diluted, trying to do smaller line and go over some of them. Always check to see if at arm's length the pattern is still visible, you don't want it too small (That "trick" is good for every project to check for contrast and such).
Je fini l'effet en éclaircissant mes textures avec du miskatonic grey dilué, en faisant des lignes plus petites, en revenant sur certaines et en créant des nouvelles afin d'apporter de la diversité.
C'est intéressant de regarder la figurine à bout de bras pour voir si l'effet est visible à distance et pas uniquement à 3cm de la figurine! (Ce petit check est utile pour la peinture en général afin de vérifier la visibilité et lecture d'une pièce!)

That's all folks!

I'm actually working on the Astraeus super heavy tank for my knight of the Chalice, which will take some time, I'm not sure when the next article will be to be honest. If you have questions or subjects you'll be interested in, feel free to contact me!
J'ai commencé à travailler sur le tank primaris Astraeus pour mes knight of the Chalice, ce qui va me prendre un moment, je ne sais donc pas quand sera le prochain article en toute honnêteté; si vous avez des questions ou des sujets qui vous intéresse n'hésitez pas à me contacter!
Anamnesis studio
Small teaser!
Anamnesis

24 Oct 2018

[Project Soul Wars] Heroes showcase

So, I'm now officially done with the heroes from the Soul wars box!

I'm actually quite proud of this since I'm always been afraid of painting my general for fear of screwing it up and now two have been painted this year! #lifegoals 

Anyway, back to the subject, you've seen mister Spirit torment which was the first one of the bunch, and now you can have a look at the 3 other heroes from this fantastic boxset!

The little guardian of soul or the guy to make chainrasp last a lifetime hehe

Anamnesis studio
Anamnesis studio
Anamnesis studio
Anamnesis studio

I had some trouble to make his fire look interesting, the effect being so big, but in the end the result is good enough. A few things could have gone smoother but let's not get too picky, this is supposed to be a quick project!
Nothing new on this guy, he just has a bit more cooper than is friends.

Next is the Lord executioner, also called mister wobble

Anamnesis studio
Anamnesis studio
Anamnesis studio
Anamnesis studio

Fixed most of the wobbling problem with a piece of scenery from the sigmarite mausoleum. 
Probably one of the coolest mini from the set! 
I also had to find how to do the spirits, in the end, it's the same as the ghostly clothes. 
My airbrush being the main tool for this, I should be able to crack spirit host really quickly!

And now for the "plat de résistance" as we say in french, my general for the time being, the Knight of shroud on steed!

Anamnesis studio
Anamnesis studio
Anamnesis studio
Booty shot!
Anamnesis studio

Fantastic miniature and a complete pain to paint...
The main problem being, if you want to hide the joint you have to build it completely which mean some parts are really hard to access; if you don't you have massive gap to take care off and masking on this intricate design is though.

I also had to find a way to paint bone and horse flesh, I used stippling to paint the bone staying in the idea of texturing the mini, the horse is a bluish grey to stay in the same idea being the ghostly part.

The heroes being done, I'm left with 10 chainrasp, 4 chainglaives and 4 grimghast to finish this box.
The grimghast will be incorporated to a plastic kit to have 10, 4 of them being totally useless otherwise the rest should follow soonish.

A tutorial on painting the ghostly part and cloth is being worked on, should be up next week if the pictures are good enough.

In the meantime, I'll be working on my biggest project yet and a gift from my future wife.

Small teaser !

Anamnesis studio


Until next time
Anamnesis

9 Oct 2018

[Tutorial] Snow and ice base

After a long wait, it's time for the tutorial on snow base.
I had quite a few people requesting it, though it took a bit of time to take all the picture necessary.
Nous y voici, le "fameux" tutoriel sur les socles enneigées. J'ai eu beaucoup de demande sur les socles de mes nighthaunt, vous retrouverez donc ci-dessous le pas-à-pas complet afin de pouvoir les reproduire!

It's not really long but you can't do it all in one go, you've been warned.
I split this between building the base and the painting, just to make it easier to follow.

Oh, and the pictures are not from the same base since I was a bit too eager on the first one and forgot to take picture, now you know.

Il y a beaucoup d'étapes mais ce n'est pas particulièrement long, garder juste en tête qu'il n'est pas possible de le faire en une session.

Vous remarquerez que les images ne sont pas toutes du même socle, c'est "normal", dans ma lancée, j'ai oublié de prendre les photos de la peinture de l'executioner, j'ai donc repris sur mon knight of shroud.


Part 1 - The build / La construction


You'll need/ Matériaux:

Sand paper (using 280 here), some textured paste like vallejo dark earth paste, pieces of slates or other rocky things and a base, obviously.
Papier de verre (j'utilise du 280), de la pâte texturé type vallejo dark earth paste, des morceaux d'ardoises ou autres morceaux de petits cailloux et un socle.

Nothing too fancy, it's quite basic but you can have some spare bits of your favourite enemy to add some dimension to the base, in this case, I'm using some spare skulls.
Rien de bien compliquer, mais il est toujours possible d'ajouter des petites pièces restantes de l'armée de votre adversaire préféré ou des crânes, c'est toujours bien un petit crâne.


Anamnesis studio
1. You need to sand your base to get rid of the textured surface, we want to have it smooth to apply the ice.
Commencer par poncer le socle pour avoir une surface lisse en préparation de la partie glacée.


Anamnesis studio
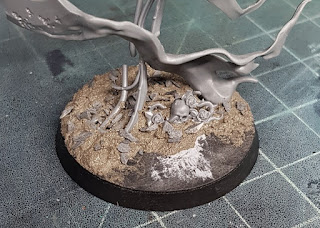
2. I added a piece of scenery to avoid the wobbling problem I had with the lord executioner.
If you want to add to plastic piece around, it's usually easier to glue them before adding the textured paste.
J'ajoute mes petits bits, dans ce cas pour éviter le syndrome de la gigote du lord executioner, c'est en général le bon moment pour coller pièces plastiques avant d'ajouter la pâte texturée.


Anamnesis studio
I'm a bad photograph...


3. Time to take the sandy paste and apply it liberally, I avoid the front and leave the base bare where I want to add some ice. Try to add some volume to the sand to make it more interesting.
C'est le moment mettre la pâte texturée sur le socle, j'ai évité la partie frontale en la laissant libre pour pouvoir y mettre la glace. J'essai également de créer des volumes avec la pâte afin de donner de l'intérêt.


Anamnesis studio
4. Before the paste is dry, I sprinkle some pieces of slate on it. To fix the piece, I used a few drops of terrain fixer from scale 75, if you don't have it, just use diluted pva glue.
Avant que la pâte soit sèche, parsemer la zone texturé avec des petits morceaux d'ardoises. Je fixe ces morceaux avec quelques gouttes de terrain fixer scale 75, si vous n'en avez pas, un peu de pva dilué suffit. 

And where done with this part. 
Really quick, which was the idea considering how many miniatures you need in a nighthaunt army! 
Just remember to do the step 4 after applying the paste and not applying it to all the base otherwise it will dry on surface the slates will bounce off.
Et c'est étape est finie, le but étant d'avoir des socles faciles à faire pour mes nighthaunt vu le nombre de figurines nécessaires.
Pensez juste à faire l'étape 4 juste après avoir appliqué la pâte texturé, plutôt que de faire l'ensemble des socles, sinon elle va sécher en surface et les morceaux d'ardoises ne colleront pas.


Part 2- Painting / La peinture


Paints and products / Peintures et produis utilisées:


Anamnesis studio
Dark sea blue (vallejo), Sotek green (gw), Caribbean blue (s75), miskatonic grey (s75), white (I'm using schminck, but any one will do), blue marine ink (missing from the picture)
Optional / optionnel: Violet ink, green ink, magenta (vallejo)

Krycell fine snow, krycell adhesive, krycell snow wash and tim holtz distress crackle paint clear 
Optional / optionnel: mininatur blossom stripes magenta
For a complete review of krycell products, see my last article here
Pour un test complet des produits krycell, je vous renvoi sur mon dernier article ici


Anamnesis studio
1. Paint the whole base with dark sea blue
Peigner l'entièreté de la base avec du dark sea blue


Anamnesis studio
2. Start by dry brushing the sandy part with sotek green.
Brosser à sec les parties sablées avec du sotek green.


Anamnesis studio
3. Next, I used an old brush to do the icy part, using sotek green, I dab my brush like a sponge. Here is a little video showing the process. If you colour the sand a bit, it will be corrected in the next step.
Repeat this process using caribbean blue, try to be random, the point is to see the different layer to build depth.
(No pictures or the blue because between my eagerness and trying to take a decent shot of this, I forgot this step and had to go back after the white...)
J'utilise un vieux pinceau pour faire les parties glacées, je tamponne gentiment mon pinceau avec du sotek green sur les parties lisses du socle, puis avec caribbean blue en gardant une certaine visibilité des couches précédentes par transparence. 
Le procédé en vidéo cette fois! La deuxième photo est manquante car entre la tentative de vidéo et mon élan, je l'ai oublié et j'ai dû reprendre la glace.
That's mostly a test, I hope it's working - Speed x2


Anamnesis studio
5. Drybrush the sandy part again using miskatonic grey, but lighter than in step 2. 
Brosser à sec la partie texturé avec du miskatonic grey, mais plus léger que l'étape 2.


Anamnesis studio
6. Finish the icy part, dabbing some white.
Pour finir la glace, répéter le point 4 avec du blanc.


Anamnesis studio
7. Optional step, I add some light patchy glaze of ink, changing between green, violent and magenta on the sandy part to break the surface. 
Optionnel, j'ajoute des petits glacis par patch avec l'encre pour créer de l'intérêt, avec du vert, du violet et du magenta sur les parties texturées uniquement.


Anamnesis studio
8. Last step is to do some light glaze of green ink on the icy part to add some depth since we will add a transparent layer on top. It's also time to paint all the little bits and pieces you may have added on your base.
That's usually where I finish the mini and varnish it before doing the next step.
C'est le moment de faire des glacis sur la partie glacée avec du vert pour nuancer cette espace, ce travail étant visible avec la couche transparente qui viendras par-dessus. 
Si vous avez des petits bits, c'est un bon moment pour les peindre.
A cette étape, je fini de peindre la figurine et la vernis avant de passer aux étapes suivantes.

9. Fun part is now to put the distress crackle paint on the icy part, to be afraid to overlaps a bit the sandy part. The thicker the paint, the bigger the cracks and vice-versa. 
It's up to your preference really, I still suggest doing a few try on a piece of cardboard first. Leave it to dry thoroughly before the next step! #missingpicagain
Pour la partie amusante, c'est le moment d'appliquer le vernis à craquelé distress sur les parties de glace, n'hésitez pas à dépasser un petit peu sur la partie texturé pour ajouter du réalisme. Plus la couche est épaisse, plus les craquelures seront grosses et vice-versa.
A vous de choisir quel effet vous préférez, je recommande néanmoins un petit test préalable pour voir comment réagis le vernis. 
Laisser bien sécher avant l'étape suivante!


Anamnesis studio
10. A light wash of marine blue ink on the ice specially on the cracks will give this iceberg effect. Just be subtle you don't want the whole ice turning blue though.
Un wash de marine blue ink sur la glace lui donne un aspect digne d'un iceberg, bien se concentrer sur les craquelures afin de colorer les tranches du vernis. Vous avez meilleurs d'y aller léger afin de pas rendre la glace trop bleue.


Anamnesis studio
11. Final step for the ice is to drybrush some white on the ice to give the frosted look, then  apply a snow wash on the sandy part next, just remember to shake it properly!
La dernière étape sur la glace est de faire un brossage à sec de blanc pour lui donner cette aspect givré et d'appliquer le snow wash sur la partie texturée, penser à bien secouer le pot!


Anamnesis studio
12. I added some magenta flowers on the earth, to give some contrast to the gheist on top.
J'ajoute des fleurs mininatur magenta pour finir sur les zones de terre afin de contraster avec les fantômes.


Anamnesis studio
13. Final step, it's time to add the snow, I'm mixing krycell adhesive with their fine snow to make something similar to dental paste, apply it liberally on the base, trying to make some volume with the paste. I also add some snow spots on the ice, it's a nice way to cover mistakes.
C'est finalement le moment d'ajouter la neige, je mélange ma neige krycell avec la colle krycell jusqu'à obtenir un mélange proche du dentifrice en consistance. Je répartie cette pâte sur le socle, j'essaie également de faire des petits monticules pour donner du volume. Je n'oublie pas de faire des petits tas sur la partie glacée, c'est un bon moyen de cacher les éventuelles erreurs.

And you're done! The finished mini will be presented along his friends in the next article.
Et c'est fini! La figurine finie sera présentée avec ces potes dans le prochain article.

Anamnesis