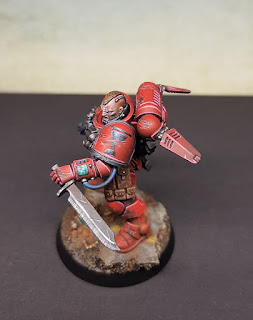
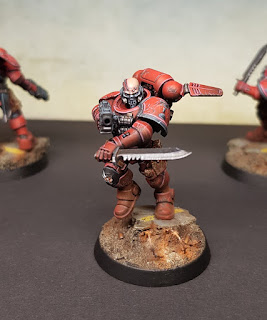
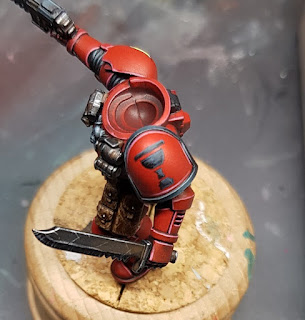
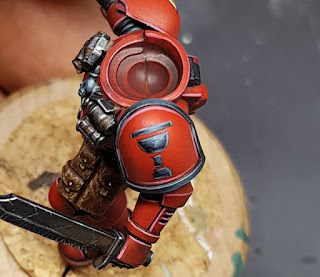
I'm back with a small tutorial on painting black as this one has been requested a few times.
Nothing too complicated, I'm basically using 3 colours to paint this , the fun part is you can replace the middle tone by anything you like to give you different effect (green, blue, purple, etc...)
De retour avec un petit tutoriel sur le noir, celui-ci ayant été demandé à plusieurs reprises.
Rien de bien compliqué, je n'utilise que 3 couleurs, le point intéressant est qu'il est possible de remplacer la teinte par n'importe quel autre couleur pour avoir des finitions bien différentes (bleu, vert, violet, etc...)
 |
| This is the black we are talking about |
Considering this black, I'm using:
Dans ce cas, voici les couleurs utilisées:
- Black / Noir (Vallejo or Kimera Kolors)
- Vallejo Dark sea blue
- White / Blanc - Kimera Kolors
I'm mixing my transition on the palette to make it easier to pick the highlight.
Je prépare mes transitions directement sur ma palette pour simplifier la peinture.
 |
| With numbers for easy reference to the refering step |
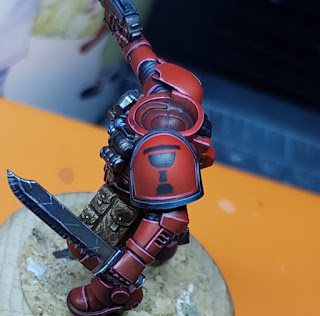
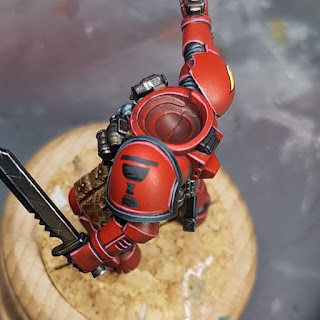
N.B. The pictures are on the chapter symbol on the shoulder of my reiver to give you an idea of the process, I'm a bit rough with my transition because the object is really small on you don't really see it. I can't really do the same on shoulder pad or boltgun, where I'm using the loaded brush technique to keep it simple.
N.B. Les photos sont sur le symbole de chapitre pour mes reivers afin de vous donner une idée du procédé, je le traite assez rapidement sans forcément lisser toutes les transitions, vu la taille de l'objet, je fais volontairement les éclaircissements avec des traits.
Pour les épaulettes ou le bolter, j'utilise en général la technique du "loaded brush" afin de faire le dégradé d'une traite sans me prendre la tête.
1. So the first step is to paint the part black, I always suggest to basecoat some black over the undercoat even if the primer is black because the colour is usually quite different and make touch up easier.
La première étape est de repasser en noir les zones à traiter. Je le recommande même si vous utilisez une sous-couche noire afin d'avoir une couche uniforme et de pouvoir reprendre les ratures facilement.
2. I define my first highlight generously with pure dark sea blue, you won't see much at this stage, but it gives a nice cold undertone
Je définie ma zone d'éclaircissement rapidement avec du dark sea blue, on ne voit pas grand-chose et c'est normal, il s'agit de donner une jolie teinte de fond.
3. Start the "real" highlight adding white to dark sea blue.
Premier éclaircissement en ajoutant du blanc au dark sea blue.
4. The second highlight is applied adding more white to the previous mix in two step.
Second éclaircissement en ajoutant encore du blanc, selon les besoins, je le fais en 2 étapes.
5. Final step is making the "edge" highlight using white with a tiny bit of dark sea blue, you want a slightly off-white.
Je marque les arêtes avec du blanc mélangé à une pointe de dark sea blue afin de lui donner une légère teinte.
6. Step is mostly touch up if you want overboard with the highlight, you can glaze back some dark sea blue or black as needed.
Dernière étape, on corrige les éventuelles erreurs et je reprends les transitions avec des glacis de dark sea blue ou noir si j'ai été trop généreux sur les éclaircissements.
And there you go, easy black with 3 colours to have a cold black with a light blue tint.
Et voilà, un joli noir rapide avec seulement 3 couleurs avec une légère teinte bleutée.
I'm working a few different things I'm hoping to be able to present them soon!
Je travaille sur différentes choses en ce moment que j'espère bien pouvoir présenter prochainement!
Until next time !
Anamnesis


