22 Jul 2022

[Review] Wet Palette v2 painter edition - the return of the king

Alright after a kickstarter in the middle of a pandemic and all the mess that come with it, the wet palette has finally arrived ! Also I paid for this product just to be clear :) 

I took much longer than anticipated and I know that's been as frustrating to the backers than the creators, but it's finally here, and it's glorious! 

If you follow me on the blog or social medias, you probably seen the wet palette for many years now in the background of my pictures, that unmistakable orange top which wasn't really orange at the end...
Well the upgrade is here and a few quirks from the old one has been corrected !

I won't spend too long on why a wet palette is useful and why I love the Redgrass one so much, you can find more details in this article but I will concentrate on the evolution from the previous one.

Quick note, I'm reviewing the painter palette which is the smallest of the two, it is now a bit bigger than the original but still more or less A5 size, if you want the bigger one look for the studio model.

So what's new ?

First thing, appart from the bigger size, the lid is now air and watertight, and straight on this is a huge change. I live relatively dry appartement and don't count the time I came back to a dry wet palette, now even when it's 36°c outside like today, coming back the day after the same amount of water is in there !
The "drawback", you need to open it correctly otherwise you'll lift the whole palette because it's quite tight.
Final touch on the lid, you now have a classy 3d logo on top !

New pretty packaging including the way on the side

The foam is double the thickness of the previous one, which mean it's easier to control the amount of water in the palette, where I sometimes put to much water on the previous one and it went one the paper.
It's still the same quality as the previous one otherwise and you get a spare one in the package!

What's in the box !

There are two new wavy thingy to clip to the palette, one are a little wells for shade, pigment, wash, etc... and the second one is to "lock" in place your contrast or shade pots to avoid spilling.
Since I don't use citadel pots, this will be a nice pot for pigments or holding tiny pieces when building models.
Instead of magnet, the new system is a slid-on which lock at the end, it's really strong and you can lift the whole palette with the wavy now. Since it's so tight it's a bit difficult to take it off when it's locked, as a personal preference, I just use it on the side on it's own. 
As a reminder, don't use aggressive solvant to clean it, it's still plastic and don't spill your plastic glue on top (been there, done that... )

Already in use !

Now for the new membrane, this is something else and some people have been able to clean it up to 8-10 if you take care of it. You need to remember to clean it though otherwise you'll end up with dry paint that won't go away, again like me, on the other hand with the new lid it take that much longer !

The way the paint react on the paper is different from the first generation and need some getting use too. The paint tend to really stay on the spot and don't run all over the place if it's a bit to wet if you compare to the old one, I like it but it might no be for everyone, just try for a few time as you need to adjust a bit like changing for a new brush when you are used to the behaviour of the old one.

First clean, the lid wasn't really close so the paint dried and I couldn't take it off, that's on me!

Washing is pretty self explanatory, just use a soft brush to avoid damaging the membrane, let it dry and you're good to go again! I really like this and less waste is always good!

Second clean, rehydrating the membrane actually allowed me to take part of my first mistakes away 

For example if you spill you paint on it, just go clean it and use it again ! 

I still love the portability of the system and the sheer functionality, still my most used tool and with this heat, it's more useful than ever. 

If you can afford it, I can more than happily recommend it! 
If you consider upgrading from the original, it's really up to you, mine was pretty used at the time and I was looking forward for the new paper and watertight lid as that was a small grip I had on the small one!

If you're interested, check it on Regrass website with this affiliate link Everlasting Wet Palette Painter v2 !

Next article will be a small tutorial on the red of my daughters of khaine as I was asked a few times how to do it!
Happy painting

Anamnesis


14 Apr 2022

[Review] Redgrass wet palette, glass palette and holder

Regdrass wet palette has been a stapple of my painting for a few years now and the company has evolved from a “just” a wet palette to different products aimed for the hobbyist. (Now with their siege in Switzerland!)

Now in 2022, I’m happy to be in a partnership with Redgrass games as I was more than satisfied with their products, they sent me a new wet palette waiting for the V2 I ordered on the Kickstarter, a new glass palette and one more painting handle and caps, because there are never enough caps!

So here is my little review of the different products I have tested and used for the last few years from them!

La wet palette Redgrass games fait partie de mon arsenal depuis ces débuts en 2017-18 et l’entreprise a évolué pour proposer aujourd’hui toute une palette de produit pour la peinture sur figurine (avec maintenant leur siège en Suisse ! Bienvenue chez nous !)

Depuis début 2022, je suis entré en partenariat avec Redgrass étant particulièrement satisfait de leur produit, ils m’ont gentiment envoyé une nouvelle palette humide (la mienne ayant bien vécu) en attendant la réception de la version V2 du Kickstarter que j’ai acheté, une glass palette pour tester ainsi qu’une seconde painting handle avec des embouts !

Voici donc un petit retour des produits que j’ai pu tester sur ces dernières années/mois

Wet Palette – Palette humide

For those of you who follow me on social media, you probably have seen more than a few times the unmistakable orange background of my wet palette. Becoming less and less orange with time has I’ve been using the lid as a dry palette when I couldn’t find a piece of cardboard or other at hand (more on this latter, but even with a wet palette, certain things need a dry palette).

This is the most used and long lasted tool in my painting area, and I wouldn’t want to try do without!

I’ve been using a wet palette for years, but Redgrass made a product more convenient and practical. This was a nice upgrade from first a Tupperware then masterson palette, the anti-mold and pre-cut paper specially made for this was a quality of life improved. It means I don’t have to cut to shape how many sheets of baking paper, but everything is ready to use when I want to paint.

The original wet palette has been retooled a bit to become the painter lite and it’s the new white one you can see on my pictures. It’s supplied with 2 foams and 50 sheets of paper, the joint seems to have been improved has it’s much tighter than my original, stylish packaging and functional product, what more do you need?
Overall, a nice improvement over the original for the entry product in the line of wet palette!
I’ll get back to the new palette and specifically the new re-usable paper when I’ll receive it.

Pour ceux qui me suivent sur les réseaux sociaux, vous avez probablement remarqué cette fameuse palette orange qui apparait sur beaucoup de mes photos en cours. Devenu de moins en moins orange avec le temps principalement parce que j’utilisai le couvercle comme palette sèche quand je ne trouvais pas un bout de cartons (pure fainéantise), j’en ai maintenant une nouvelle pour faire de jolie photo !

C’est indubitablement l’outil le plus utilisé dans mon coin peinture et celui qui m’as duré le plus longtemps sans le remplacer, et honnêtement je ne pourrais pas m’en passer.

J’utilise une palette humide depuis des années, en ayant commencé avec une tupperware d’un fast-food et différentes variantes d’éponge découpé, papier ménage, etc.., la palette Redgrass est-elle un package complet ; avec la palette, la mousse anti-moisissure et le papier prédécoupé spécialement prévu pour la peinture acrylique difficile de faire plus facile d’utilisation !

C’est extrêmement pratique et ça me permet de me mettre directement à la peinture sans devoir penser à découper des bouts de papier cuisson avant chaque session (ce qui ne semble comme rien mais qu’elle gain de temps et en qualité de vie en définitive !)

La palette originale orange a été retravaillé pour devenir la palette Lite, avec une amélioration du joint qui est beaucoup mieux, les mousses semblent mieux découpées également.
Une agréable amélioration sur le produit d’entrée de gamme de leurs nouvelles sélections de palette humide montrant la volonté d’améliorer même les produits existants, un plus!

Livré avec 2 mousses et 50 feuilles prédécoupés, c’est l’outil pour moi indispensable et j’attends avec grande impatience la v2 et son nouveau papier réutilisable !

Wet and glass palette side by side!

Glass palette – Palette en verre


I might be surprising for some people, but even with a wet palette, a dry palette is a very useful tool.

Oil paints really don’t like water (apart from special oil paints) nor does white spirit, you don’t want wet paint for dry brushing and when building base, you need somewhere to put white glue for sand or tufts.

It’s always useful and I’ve been using old cd, cardboard, or a piece of cork as a dry palette always throwing this stuff away after one or 2 sessions.

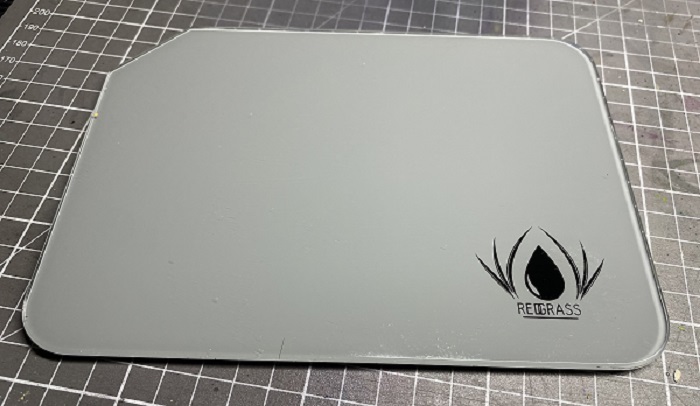
Enter the glass palette, which is exactly what I say on the box. It’s a palette made of glass with a grey font to be able to see what colours you put on, supplied with four anti-slip feet to avoid pulling your brain trying to pick up the palette from a flat surface. The edges are rounded so you won’t cut yourself and one corner is “cut” so if you put it in the wet palette or tape it to the lid, you still have a way to take it out! As we say, details matter.

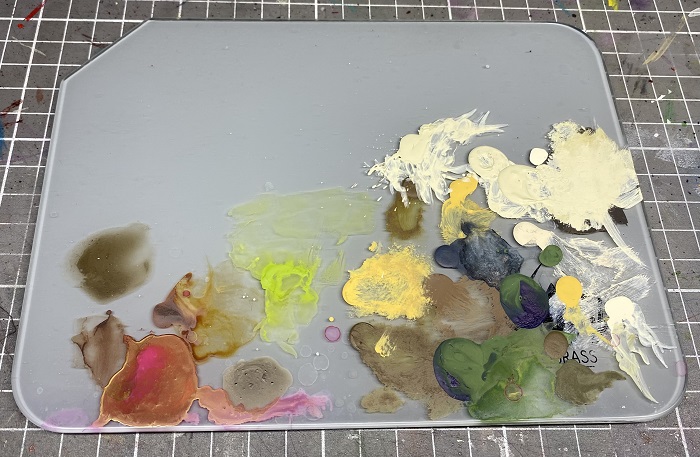
The glass being smooth, it’s easy to clean with a wet wipe, if you’re using oil or white glue, just let it dry and you’ll have the joy to peel out the dry stuff!

To put it to the test, I’ve used it with oils, acrylic paints, and white glue which I let dry as I was confidant, I could clean it.

So, it works but I had to scrap the acrylic paint with a toothpick as it really sticked to the glass, I would suggest cleaning it at the end of the session to avoid scrapping too much. Don’t use metal tool to clean as this will damage the glass and make is porous!

Again, a well though product and you can see the care taken in the functionality but also on design.
It is indispensable? Not really. Is it something convenient that you’re not going to replace for years? Yes

I was on the fence when I saw this release procrastinating whether to get it or not, but I was sent one for free to test and I realised that I’m using it much more than I even expected.

Before full cleaning

Ça peut sembler surprenant mais la palette humide ne fait pas tout, pour certaines choses une palette sèche est nécessaire.
Par exemple, les peintures à l’huile n’aiment pas l’eau, tout comme le white spirit ou même les peintures métalliques acryliques qui ont tendance à se séparer trop vite. Même pour la construction des socles afin de déposer une goutte de colle pour la diluer ou même pour coller les touffes d’herbes de finitions.

Bref c’est toujours utile et cette palette en verre est un bon moyen d’éviter les petits bouts de cartons ou lièges volant avec de la peinture à l’huile qui trainent partout (et je fini toujours par mettre le coude ou la main dessus, pas terrible).

Bien emballé dans de la mousse pour éviter la casse, la palette est sans surprise en verre au bord bien arrondi, le dessous est peint en gris avec le logo Redgrass pour permettre de mieux distinguer les couleurs posées dessus et 4 petit pieds anti-dérapant sont livré avec qui sont bien utile pour bouger la palette (soulever un morceau de verre sur un bureau plat peut être un cauchemar). Un coin est biseauté pour permettre de la récupère facilement si vous la stocker dans la palette humide, celle étant faite pour s’emboiter parfaitement.
Certaines personnes ont d’ailleurs collé la palette dans le couvercle de la palette humide pour faciliter le transport.

Le verre étant lisse c’est facile à nettoyer en fin de session avec une lingette humide, ce que je recommande plutôt que de tout laisser sécher ! Ce que j’ai d’ailleurs fais pour ce test, voir la possibilité de nettoyage et tester un peu la porosité du verre (spoiler, éviter cette écueil)

C’est très lisse et ça se nettoie nickel mais la peinture acrylique accroche très fort et est un enfer à nettoyer que j’ai d’ailleurs fini par gratter au cure-dent, les huiles et les colles sont à laisser sécher, il devient très facile après coup d’enlever cette couche (c’est d’ailleurs en petit plaisir en soit d’enlever ces croutes)

En finalité un produit joliment présenté et étonnamment bien pensé pour une « simple » palette sèche.
Indispensable ? Pas forcément, mais c’est un élément utile que vous pouvez garder des années avec une entretien minimum, c’est un confort complémentaire pour mes sessions de peinture.

J’étais un peu mitigé sur la sortie de ce produit quant à l’achat ou non, mais après l’avoir testé, je me rends compte que je l’utilise beaucoup plus que ce que j’aurai pensé ! Un petit outil qui semble anecdotique mais en fait bien utile.

Painting holder with rotating head – Support de peinture

I’ve been using painting handle forever, from bottle cork to old citadel pot and I’ve seen a few iterations of painting handle from different company.

From late though I’ve been using the Redgrass holder more and more, easy to set up and use, small size mean I can have 10 minis in front of me it’s not going to take my whole space. I use the cap on its own and pop on the handle when I’m going to spend more time on a specific part, as it’s more comfortable.

The system for switching cap is clever and let you have an infinite number of caps without having 15 handles laying around, but the best part for my clumsy finger is the magnet at the bottom of the handle. I can’t count the number of times I knocked around my project.

Place the metallic token included somewhere safe and the handle will stick to it, I even put them on the stand of my lamp so I’m sure there are safe (the magnet is strong!) and always at the reach of hand.

You can rotate the caps on the handle without removing it, quite practical considering the ergonomic handle. The putty is firmer than blue-tac and hold piece really well, you can have some small residue on the mini or base but just use a little piece of putty to take it off.

Be careful when using oil has the putty don’t react well to white spirit.

My only grip for the moment is I don’t have something to pin little piece like a piece of cork, but I know Redgrass are working on an alternate cap for this!

Considering the price, this is the handle I would recommend anyone interested in them!

Etant d’un naturel maladroit, j’utilise depuis toujours de support pour peindre mes figurines, ceux-ci en vécu différentes variantes en même temps que l’évolution du marché des figurine.

Jen ai testé un certain nombre d’entreprises variés, mais j’utilise de plus en plus celui de Redgrass pour sa simplicité et fonctionnalité. La dimension des embouts me permet d’avoir plusieurs figurines en cours sans prendre l’ensemble du bureau et j’utilise la poignée de façon ponctuelle pour plus de confort.

Le principe des embouts amovibles est très bien pensé et fonctionnel, ce qui permet d’avoir plein de supports sans nécessairement avoir 15 poignées qui trainent également. Une fois sur la poignée le petit support permet également une rotation à 360° degré avec le pouce, ce qui est important en considérant la forme ergonomique de la poignée.

Mais le détail qui m’as conquis est bien l’aimant à la base de la poignée ! Ça peut paraitre tout bête mais je ne compte plus le nombre de fois où j’ai renversé mes supports en cours de peinture, ici pas de problème, il suffit de coller la pastille métallique fournit dans un endroit sûr et hop la poignée s’accroche et à moins de vraiment le vouloir celui-ci est suffisamment puissant pour retenir un coup accidentel.

La pâte est suffisamment ferme et collante pour y placer les figurines facilement ce qu’elles ne bougent, s’il y a des petits résidus qui restent, tapoter avec un peu de pâte et ça s’enlève facilement.

Attention avec les huiles, la pâte n’aime pas du tout le white spirit !

Mon seul regret pour le moment c’est qu’il n’y a pas un embout pour les pièces contre-percés mais Redgrass est en train de plancher sur des embouts alternatifs pour ce genre de situation !

Vu le prix, c’est un accessoire que je recommande avec plaisir !


The shop ! https://www.redgrassgames.com/

We also received the first few pictures of the new lamp in the making and it looks gorgeous! Kickstarter to come this summer for this

Again, as an architect, I love the attention to design and functionality and couldn’t recommend them enough!

Nous avons reçu les premières images de la lampe développer spécialement pour le hobby et le design donne terriblement envie ! Kickstarter à venir
En tant qu’architecte, j’adore cette attention du détail sans sacrifié la fonctionnalité et je ne peux que les recommander !


3 Feb 2022

[Tutorial] Lightning power weapon

Sooo I'm not dead, and actually I've been painting quite a lot to be honest, 2021 was a bit of a strange year, but I may get back to it on another post as most of you are not here for this.

De l’activité sur le blog !!! Eh oui je ne suis pas mort, j’ai même été particulièrement actif sur le coté peinture, mais beaucoup moins bon sur la partie blogging, 2021 ayant été une année un peu difficile pour moi, je reviendrais peut-être là-dessus dans un autre post.

So, after playing a bit with a scheme for my custodes force (new year, new army got me again....), I decided to do amethyst power weapon inspired by a few representations I saw on Instagram, and by the overwhelming response I received on social media and request for step by step, it seems to be a success!

So here we are with the first tutorial of the year (will there be another one? no idea)!

Comme d’habitude, je me suis fais avoir par le « new year, new army » et n’ayant que très peu de retenu je suis parti sur les custodes en me disant que je n’aurais pas besoin d’en faire 10000. Après quelque recherche sur les réseaux sociaux, je me suis décidé pour des armes énergétiques violettes. Avec le test de base, le résultat sur le blade champion et devant le nombre de demandes, voici le 1er tuto de l’année pour refaire ce type d’effet.

Disclaimer, this is just one way of doing it with amethysty but it is more or less adaptable to any colour you want, just keep in mind different colour may react differently with black and white paint, you could also simplify the way to do it, feel free to experiment!

Comme toujours, ceci n’est que mon approche basée sur ma façon de peindre, il y a surement plein d’autres façon probablement plus rapide de faire quelque chose de similaire. Je suis parti sur une couleur améthyste mais la couleur principale est interchangeable selon vos préférences, gardé en tête que toutes les couleurs ne réagissent pas de la même façon au mélange au blanc et noir.

Paint used:

- Black (which ever you like)
- Amethyst vallejo fantasy pro
- White pro acryl (the best white ever) 

I'll use the blade of an achillus dreadnought for reference as it's pretty big, it's easier to see the process
Les photos proviennent de la lance du dreadnought Achillus qui permet de bien se rendre compte du procédé


1. Just paint the blade black
 On passe la lame en noir pour être propre


2. Time to sketch the general lightning with a mix of white and amethyst, just give a direction to your highlight as this will be smoothed later. I don't dilute the mix to much as you want a good coverage, give it two coats to have a nice and plain highlight
 On sketch rapidement l’effet général de l’éclair pour donner la direction globale avec un mélange de blanc et d’améthyste, je reste assez grossier avec une peinture moyennement diluée afin de bien couvrir, mais 2 passages sur les parties centrales sont nécessaires pour bien couvrir le noir.


3. With white and a tiny bit of amethyst defines the origin of the light source with the paint a bit more diluted, pull the paint toward the light source to leave the pigment at the junction between the blade and the handle

Avec un blanc légèrement cassé à l’améthyste, je viens marquer ma source de lumière en tirant mon pinceau vers la source afin de bien déposé les pigments de blanc sur la jonction lame-poignée 

4. Time to glaze, with pure amethyst diluted, glaze the whole blade just avoid the white source. You'll need to do this a few times. In this case, it took me 3 passes.
C’est le moment d’adoucir les transitions, avec des glacis d’améthyste pure, je viens fondre les éclaircissements avec la base noir en passant sur toute la surface. Plusieurs passages sont nécessaires, dans ce cas, j’ai eu besoin de 3 passages. 

5. Just glaze some white again to bring back the light source if like me you want a bit overboard with the previous step. The bigger the white area, the brighter the light source will appear.
Vu que je me suis un peu emporté avec les glacis, je viens reprendre ma source avec mon blanc cassé, gardé en tête que plus la zone blanche sera grande, plus la source donnera l’impression d’être intense.


6. Fun time, we're going to draw the lightning with white and tiny bit of amethyst, you'll need a nice and pointy brush with a big belly, the paint needs to be well diluted and don't charge too much the brush or you won't be able to control your line. Now it's a good idea to have a reference for the lightning but in a nutshell, connect some tiny lines instead of trying the paint the whole thing in one go. Take your time and try to connect lines where you applied the highlight on step 2     
 
C’est le moment de dessiner les éclairs à l’aide de notre blanc cassé ! La peinture doit être bien dilué et il est important d’avoir un pinceau avec une bonne pointe et un bon réservoir pour pouvoir travailler et contrôler le trait. Ne charger pas trop le pinceau non plus sous peine de faire des amas, testé rapidement sur votre pouce pour avant de vous lancer sur la lame, avoir une référence d’un éclair aide aussi pour reproduire le tracé. Travaillez en petits traits qui se connectent plutôt que d’essayer de le dessiner en une fois et joignez différentes lignes sur les éclaircissements réalisés à l’étape 2


7. To bring everything together, glazed again with amethyst
Un petit glacis d’améthyste pour lier le tout


8.go back with white to highlight the lightning where the line cross or where they meet the edge of the blad, with a few lightnings connecting together on the edge,  this will create a really bright point
Je viens reprendre mes éclairs avec le blanc cassé sur les zones ou plusieurs « branches » se croisent et donner l’effet d’intensité variable dans l’éclair. Je force également le blanc sur les zones touchant le tranchant de la lame.


9. Shade the recess and black line the filigree or details on the blade with black being careful not to go over the previous work
Je viens ombrer les creux et surligner les filigranes avec du noir légèrement dilué en faisant attention à ne pas recouvrir le travail précédent.


10. To finish the blade, highlight the edge with white and tiny, tiny bit of amethyst but instead of doing a straight line try to stipple the edge to give a bit of texture and voilà! (You can see I missed the top edge on the picture, and this has been corrected now) you can add a bit of white to the light source if it's not light enough
Je fini la lame en venant éclaircir les arêtes avec mon blanc cassé, mais au lieu de faire une ligne continue, je viens tapoter mon pinceau pour créer une texture sur ces arêtes et en forçant le trait sur les zones ou l’éclair rejoint le tranchant. Je viens marquer à nouveau ma source pour renforcer l’effet et voilà !

There are a few steps involved but it's pretty quick on basic custodes blade, this weapon is massive and took a bit longer.
Ceci peut sembler fastidieux mais c’est en réalité très rapide sur les petites lames des custodes standard, les armes des dreadnoughts étant particulièrement grandes.

Anyway, enjoy painting and feel free to tag me if you try the tutorial!

N’hésitez pas à essayer avec d’autres couleurs et tager moi si vous essayer le tuto !

Happy painting

David - Anamnesis

14 Apr 2021

[Tutorial] Lost temple base

Hello dear reader(s?),

Long-time no see!
The last blog entry date back from November, so it's been a while.

That was just before I became a father, so that's why I'm a bit busy and to be honest I had no real motivation to write any articles. The global situation and the general tension is getting a bit rough to handle and I find it hard to motivate myself to do anything.

I'm still amazed by the number of people checking the blog though and I'm happy my tutorials are still being used!

Trying to get back in the game and with the requests I received on social media, I made a tutorial on how I painted the base for my latest project, my daughters of khaine.

The idea was to have a something akin to a lost temple environment. I did experiment a bit to find the right balance, but I think this is quite nice while being really easy to do and replicate.
Which is really relaxing after the strain of painting nmm (seriously what the heck was I thinking).

Anyway, here is the result you can expect from this tutorial on my melusai Ironscale.

I’ll be using a simple 25mm base to show you the process.
I haven’t covered how to build  the base but it’s a piece of cork with a juweela concrete tiles on top, which have been weathered with a cutter and brute force, the side and crack are then filed with sandy paste of your choice (dry earth from ak in this instance).

Paint used:

  • S75 Brown leather or Ammo one shot primer brown oxide (good to prime with)
  • Vallejo Japanese uniform
  • Kimera kolors Cloudy sky
  • S75 Sandalwood
  • S75 Nacar
  • S75 Dark forest green
  • Vallejo green olive
  • S75 Autumn green

First step is to cover the whole base with the brown, s75 or ammo, they are very similar

Now as you may know, I love using sponging for bases, as I find it makes wonderful texture. So, grab a piece of sponge and start sponging Japanese uniform on the tiles.

Sponge again cloudy sky this time on the tiles again.


Touch up the sandy part with a bit of brown if you need and drybrush them with sandalwood

Very light drybrush on the sand again with nacar this time

Now for the messy part and to give the greenish tint to the base, we will be working with very diluted paint. I prepare 3 little pool of the 3 greens to have them available and mess around on the fly.

Start making little pool of dark green, then olive and light touch of autumn green, mixing them on the base and leaving them pooling in the recess as needed wanted. Make some pool on the tiles too to represent moss slowly growing on the stone. You can see it still wet on the picture.

Let it dry overnight or just 2 hours if you’re in Australia or somewhere similar. 


The small base and his bigger brother next to each other after a night of drying.

Finish the tiles with additional sponging of cloudy sky, try to be light and don’t cover all the previous work. Paint the rim black and you’re good to add all the grass you want!

I’m using a mix of tufts from rival craft, polak, mininatur of different colours but it’s entirely up to you 😊

I hope you enjoyed this little tutorial and find it useful, let me know if you need more precision in comments or just contact me on my social media

Until next time, take care!

Anamnesis


2 Nov 2020

[Showcase] Warcry Iron golem, Unmade & scenery

So, it’s been a while since the last article again!

The global situation being a bit strange, my general motivation to write has been pretty low, mostly because I mostly work from home.
But I had quite a few people telling me they enjoyed reading the content of this blog and I thought it would be nice to not let it slip into oblivion, or not too deep at least…

On the plus side, I’ve been preparing the room for our first baby, which also mean my hobby time will be going down drastically at the end of the year but in the meantime, I painted quite a lot of stuff!

First thing the warcry starter set and an additional warbands so I have everything to initiate someone to the game.

I’ve played a few games and it’s quite fun and quick, which make it the perfect gateway game. AoS will remain my favourite system so far though!

I started with the iron golem to try to do something different and have as many skin tones as possible, that what also a fun exercise working with tinted metallic paint. I really enjoy them, and they did grow on me!

Colours used for the armour is a base of black metal, highlight with speed metal, then a coat of dark green ink from daler & rowney. 

The scenery has been painted trying to have them ready quickly will still being nice, mostly with spray can and drybrush, nothing special but it’s painted and look nice on the table 


The unmade were really speed painting, and that’s where I realised, I’m pretty bad at painting skin, I’m not really happy with the result and if I had to do them again, I would do something different. Also, they are really fragile, since I’m very clumsy I broke a few pieces…. 

Playing the game was a blast and I enjoy the quick pace, not so much playing against other warband not made specifically for the game as they can be a bit game breaker but it’s still fun! 

Now to catacomb or not, that is the question (I really like the scions of flame 🙈)

Until next time, happy painting!
Anamnesis

28 Sept 2020

Adepta sororitas exorcist and colours rundown

 A quick article because I never posted the picture of this little tank after the tutorial for the marble, but I did finish it after many, many hours!

Nothing really new on this but as many people requested, is the rundown of the colours used for the different parts:

Main armour:
Base Petroleum grey, highlight Gobi brown, then white sands, pin wash of oil starship filth and pick the edge with white sand

Chipping is rhinox hide

Blue cloth:
Base dark prussian blue, highlight phtalo blue then blue green, finish by adding a touch of white.

Black:
Usual recipe. base with black highlight with dark sea blue then highlight adding white 

Copper:
Decayed metal, wash strong tone, highlight with stippling a mix of pure copper and old copper, finish the edge with moonstone alchemy 

And you should have most of the recipe !


Fun fact, painting closed eyes is actually really hard...

I'll post later this week, an article more focus on my general hobby update and what's happening during those strange times.

Keep safe and happy painting !

Anamnesis