Showing posts with label Age of Sigmar. Show all posts

6 Feb 2024

2024 Update and how to lose interest in a project

Hello dear reader(s?)!

Little update here, I'm not dead 2023 has been quite the ride and I'm hoping for a more interesting 2024.

I don't blog as much as I used to for different reasons, first being a dad it's my greatest pride to be able to take care of my kid, second, some sort of boom of tutorials and patreon all over the place where people can learn to paint/build/whatever by people who are much more interested in creating contents with an higher quality than what I can do.

This mostly mean I don't really see the point on doing tutorial when much better content is already available! And I don't mean that in a bad way as it's great to see so many people happy to share their knowledge.

I'm still hoping to have the motivation to do smaller tutorial or run down of paints used when I publish something as that's still the recurring question 

2023 saw my participation in "slow grow" horus heresy campaign, which left me buzzing with motivation to do more custodes with the orion as the latest centrepiece, I also finally painted AND finished a bust, what a time to be alive ! Which also make it the biggest army I own with more than 4000 pts and growing. Fun fact, that's only 32 minis... 

I will do a more focused article on them when I can as I received so many requests for the paints used and try to get a group shot at the same time

I received and painted a blood bowl amazon team, this make it the fastest project from reception to finished.

Since I'm going to leave my little office/painting room to the second baby, I also took the opportunity to get rid of a lot of stuff that hasn't seen the light of day in weeks, months, years for some. Also looking to create a little portable painting station somewhere, tbd!

Some frustration during the year at work transformed to a spree of different project which were quickly abandoned then sold, I'm trying to not go down the rabbit hole again, but on notable note, instead of buying full armies I did order some very nice busts to paint and put in the cabinet and 75mm minis !

I started again AND sold again Titanicus as I can't play too many games, now the focus is completing the custodes and waiting for gw to finally release more sisters of silence as I really love them.
And age of sigmar to play with buddies at home mostly, I'm not too interested in competitive play and HH story driven play is much more in line with my motivation to play.
Though even that is not enough to motivate myself to paint 50 marines to actually paint a legion, go figure 😅

Latest from the chopping block is the seraphon as I come to the realisation, I really don't like painting scales and drybrush (except for bases). Which is a shame as the slann was really fun if a lot of work!


Anyway, I'm still hoping to publish more articles during this year if everything goes according to plan (spoiler, it usually doesn't work like that).

My amazon team which is a kinda speed painted but at the same time not really, a fun exercise in darker skin tones. The game was fun but not exactly what I expected though.


And a wonderful little bust from pedro fernandez, fully painted by hand for a change


Alright, that's enough rambles for today and thank you for reading !

Take care 

David

16 Sept 2022

[Tutorial] Painting red cloth

Hello everyone!

As promised in my last post, I've been asked a few times how I paint the red on my daughters of khaine, so I thought a tutorial wouldn't a bad idea to answer all your question in one go!

Comme promis précédemment, voici un petit tuto sur la peinture des tissus rouges sur mes daughters of khaine! 

A quick word on red, this one is fully painted by hand. I've found it very hard to get a nice shine on red using airbrush, that's why I prefer to paint it by hand. If I really need to airbrush because of the size of the surface, I usually finish the last layer by brush to give it more shine and saturation.
N.B.² red pigment is slightly transparent and tend to be affected by the basecoat more than other colour, If you want a very bright red, the undercoat should be very light or plain white (or use preshading) 

Une petite note sur le rouge, celui est peins entièrement au pinceau, je trouve particulièrement difficile d'avoir un joli rendu avec l'aerographe, si je commence à l'aero, je fini toujours le travail à la main.
N.B.² Les pigments rouges ont une tendance à être légèrement transparent et sont de facto plus sensible à la couleur de la sous-couche, pour avoir une rouge vif, il est préférable de sous-coucher avec une couleur claire ou de prévoir un preshading pour faciliter la peinture.
 

Final result

Paint used:

  • Scale 75 Black leather
  • Pro acryl Burnt red
  • Pro acryl Bold pyrrole red
  • White or any pink
  • Pro acryl transparent red


1. First step is to basecoat the surface with black leather (black also work if you want, it's up to you)

Première étape, une couche uniforme de black leather comme base (noir fonctionne également au besoin)


2. I begin painting my highlight with burnt red slightly diluted, you will need a few coat to cover properly, if you reduce the surface of application each time, you can have an easy blend quickly

Je commence à éclaircir petit à petit avec du burnt red légèrement dilué, plusieurs passages sont nécessaires mais en réduisant la zone d'application, je peux avoir une transition rapide et plutôt propre sans me prendre la tête


3. I highlight again using bold pyrrole red reducing the surface of application. I'm not worried about being perfectly blended for the moment but if you have some really rough transition, just glaze some burnt red back

Je continu à éclaircir avec du bold pyrrole red, en réduisant petit à petit la surface peinte. Je ne me préoccupe pas d'avoir une transition parfaite sauf si un endroit est vraiment trop violent, dans ce cas, je reprends avec un petit glacis de burnt red pour lisser rapidement le tout.


4.With pink, I highlight the surface that receive the most light. I glaze bold pyrrole red if the transition is too rough, but most of it will be corrected in the next step

Je continu avec du rose cette fois, en me concentrant sur les zones les plus exposées. Je retouche rapidos avec du bold pyrrole red si jamais la transition est trop violente.


5.It's time to bring everything together! With transparent red very lightly diluted, I glaze the whole surface a few times until I'm happy with the depth of the colour, and voila !

Etape final et le meilleurs moment, j'utilise du transparent red légèrement dilué pour faire plusieurs glacis sur toute la surface jusqu'à satisfaction et voilà !

I hope you find something useful in this tutorial and happy painting!

Anamnesis - David


14 Apr 2021

[Tutorial] Lost temple base

Hello dear reader(s?),

Long-time no see!
The last blog entry date back from November, so it's been a while.

That was just before I became a father, so that's why I'm a bit busy and to be honest I had no real motivation to write any articles. The global situation and the general tension is getting a bit rough to handle and I find it hard to motivate myself to do anything.

I'm still amazed by the number of people checking the blog though and I'm happy my tutorials are still being used!

Trying to get back in the game and with the requests I received on social media, I made a tutorial on how I painted the base for my latest project, my daughters of khaine.

The idea was to have a something akin to a lost temple environment. I did experiment a bit to find the right balance, but I think this is quite nice while being really easy to do and replicate.
Which is really relaxing after the strain of painting nmm (seriously what the heck was I thinking).

Anyway, here is the result you can expect from this tutorial on my melusai Ironscale.

I’ll be using a simple 25mm base to show you the process.
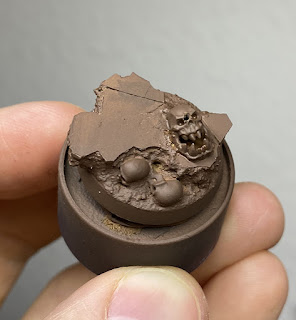
I haven’t covered how to build  the base but it’s a piece of cork with a juweela concrete tiles on top, which have been weathered with a cutter and brute force, the side and crack are then filed with sandy paste of your choice (dry earth from ak in this instance).

Paint used:

  • S75 Brown leather or Ammo one shot primer brown oxide (good to prime with)
  • Vallejo Japanese uniform
  • Kimera kolors Cloudy sky
  • S75 Sandalwood
  • S75 Nacar
  • S75 Dark forest green
  • Vallejo green olive
  • S75 Autumn green

First step is to cover the whole base with the brown, s75 or ammo, they are very similar

Now as you may know, I love using sponging for bases, as I find it makes wonderful texture. So, grab a piece of sponge and start sponging Japanese uniform on the tiles.

Sponge again cloudy sky this time on the tiles again.


Touch up the sandy part with a bit of brown if you need and drybrush them with sandalwood

Very light drybrush on the sand again with nacar this time

Now for the messy part and to give the greenish tint to the base, we will be working with very diluted paint. I prepare 3 little pool of the 3 greens to have them available and mess around on the fly.

Start making little pool of dark green, then olive and light touch of autumn green, mixing them on the base and leaving them pooling in the recess as needed wanted. Make some pool on the tiles too to represent moss slowly growing on the stone. You can see it still wet on the picture.

Let it dry overnight or just 2 hours if you’re in Australia or somewhere similar. 


The small base and his bigger brother next to each other after a night of drying.

Finish the tiles with additional sponging of cloudy sky, try to be light and don’t cover all the previous work. Paint the rim black and you’re good to add all the grass you want!

I’m using a mix of tufts from rival craft, polak, mininatur of different colours but it’s entirely up to you 😊

I hope you enjoyed this little tutorial and find it useful, let me know if you need more precision in comments or just contact me on my social media

Until next time, take care!

Anamnesis


2 Nov 2020

[Showcase] Warcry Iron golem, Unmade & scenery

So, it’s been a while since the last article again!

The global situation being a bit strange, my general motivation to write has been pretty low, mostly because I mostly work from home.
But I had quite a few people telling me they enjoyed reading the content of this blog and I thought it would be nice to not let it slip into oblivion, or not too deep at least…

On the plus side, I’ve been preparing the room for our first baby, which also mean my hobby time will be going down drastically at the end of the year but in the meantime, I painted quite a lot of stuff!

First thing the warcry starter set and an additional warbands so I have everything to initiate someone to the game.

I’ve played a few games and it’s quite fun and quick, which make it the perfect gateway game. AoS will remain my favourite system so far though!

I started with the iron golem to try to do something different and have as many skin tones as possible, that what also a fun exercise working with tinted metallic paint. I really enjoy them, and they did grow on me!

Colours used for the armour is a base of black metal, highlight with speed metal, then a coat of dark green ink from daler & rowney. 

The scenery has been painted trying to have them ready quickly will still being nice, mostly with spray can and drybrush, nothing special but it’s painted and look nice on the table 


The unmade were really speed painting, and that’s where I realised, I’m pretty bad at painting skin, I’m not really happy with the result and if I had to do them again, I would do something different. Also, they are really fragile, since I’m very clumsy I broke a few pieces…. 

Playing the game was a blast and I enjoy the quick pace, not so much playing against other warband not made specifically for the game as they can be a bit game breaker but it’s still fun! 

Now to catacomb or not, that is the question (I really like the scions of flame 🙈)

Until next time, happy painting!
Anamnesis

28 May 2020

What's new and general hobby update

Hello dear readers!

It's been some times since the last post; a general lack of reel motivation to paint or write, problem with taking proper picture for tutorials and the corona quarantine mean this blog has been mostly left to collect dust. like really it's been 3 month

But on the bright side, there is still a constant flow of people checking the blog for whatever reason. I find it fascinating and a good sign, so thank you everyone!

Since I'm really late on my update, here is everything I've been working on since February (wow that was a long time ago...).

One of the biggest project I've ever worked on for fantasy is the Tauralon from the stormcast

I really like fantasy beast in general and since I need a lord arcanum for my sacrosanct chamber, this was the perfect excuse to have a big centrepiece.
Though in game, it's not the same as is rule are a bit lackluster but it's alright.


I wanted something really colourful, but not garish. I had no real idea what I wanted to do so I was mostly choosing colours I liked and find a way to make it works together.
In the end, I'm happy with the result even if a few things could have been better.
My photobooth was too small for this model so I had to resort to other mean, in this case, a simple black t-shirt as a backdrop.

On the conversion side, it's a mix of the two rider found in the box with the head from the sequitor, I added a collar made from aventis head and that's it mostly. A simple conversion to make this model mine :)

Second unit complete!


I finally finished the liberators I started in January, that's where I realised the armour takes a lot of time, but again really moody result.
This mean I now have the basic 1 hero, 2 troops to play age of sigmar, hooray !

The next unit for this army will be the dracothian guard because I really love them.
Here is a small sample


Still in the age of sigmar setting, I've tried Warcry for the first time this week-end and honestly that was a blast and probably the best games I had in a long time !


I challenged myself to paint my warband for the first game, so I had one week to do it. Of course I failed.
They took me 10 days since I've been much busier than expected but it was a fun experiment. Proving also that I'm unable to do speed painting


No conversion this time, but I tried the metallic base and ink on top combo. I do love the result !
Everyone of them has a different skin tones by the way, fun experiment.

But my first love since they have been revealed are the unmade, so as a reward for successfully completing my certification and finishing my first warband, they are coming next week!

I'll keep my new sister of battle for the next article ;-)

Thank you for reading thus far and until next time!
Anamnesis