Showing posts with label Tutorial. Show all posts

16 Sept 2022

[Tutorial] Painting red cloth

Hello everyone!

As promised in my last post, I've been asked a few times how I paint the red on my daughters of khaine, so I thought a tutorial wouldn't a bad idea to answer all your question in one go!

Comme promis précédemment, voici un petit tuto sur la peinture des tissus rouges sur mes daughters of khaine! 

A quick word on red, this one is fully painted by hand. I've found it very hard to get a nice shine on red using airbrush, that's why I prefer to paint it by hand. If I really need to airbrush because of the size of the surface, I usually finish the last layer by brush to give it more shine and saturation.
N.B.² red pigment is slightly transparent and tend to be affected by the basecoat more than other colour, If you want a very bright red, the undercoat should be very light or plain white (or use preshading) 

Une petite note sur le rouge, celui est peins entièrement au pinceau, je trouve particulièrement difficile d'avoir un joli rendu avec l'aerographe, si je commence à l'aero, je fini toujours le travail à la main.
N.B.² Les pigments rouges ont une tendance à être légèrement transparent et sont de facto plus sensible à la couleur de la sous-couche, pour avoir une rouge vif, il est préférable de sous-coucher avec une couleur claire ou de prévoir un preshading pour faciliter la peinture.
 

Final result

Paint used:

  • Scale 75 Black leather
  • Pro acryl Burnt red
  • Pro acryl Bold pyrrole red
  • White or any pink
  • Pro acryl transparent red


1. First step is to basecoat the surface with black leather (black also work if you want, it's up to you)

Première étape, une couche uniforme de black leather comme base (noir fonctionne également au besoin)


2. I begin painting my highlight with burnt red slightly diluted, you will need a few coat to cover properly, if you reduce the surface of application each time, you can have an easy blend quickly

Je commence à éclaircir petit à petit avec du burnt red légèrement dilué, plusieurs passages sont nécessaires mais en réduisant la zone d'application, je peux avoir une transition rapide et plutôt propre sans me prendre la tête


3. I highlight again using bold pyrrole red reducing the surface of application. I'm not worried about being perfectly blended for the moment but if you have some really rough transition, just glaze some burnt red back

Je continu à éclaircir avec du bold pyrrole red, en réduisant petit à petit la surface peinte. Je ne me préoccupe pas d'avoir une transition parfaite sauf si un endroit est vraiment trop violent, dans ce cas, je reprends avec un petit glacis de burnt red pour lisser rapidement le tout.


4.With pink, I highlight the surface that receive the most light. I glaze bold pyrrole red if the transition is too rough, but most of it will be corrected in the next step

Je continu avec du rose cette fois, en me concentrant sur les zones les plus exposées. Je retouche rapidos avec du bold pyrrole red si jamais la transition est trop violente.


5.It's time to bring everything together! With transparent red very lightly diluted, I glaze the whole surface a few times until I'm happy with the depth of the colour, and voila !

Etape final et le meilleurs moment, j'utilise du transparent red légèrement dilué pour faire plusieurs glacis sur toute la surface jusqu'à satisfaction et voilà !

I hope you find something useful in this tutorial and happy painting!

Anamnesis - David


3 Feb 2022

[Tutorial] Lightning power weapon

Sooo I'm not dead, and actually I've been painting quite a lot to be honest, 2021 was a bit of a strange year, but I may get back to it on another post as most of you are not here for this.

De l’activité sur le blog !!! Eh oui je ne suis pas mort, j’ai même été particulièrement actif sur le coté peinture, mais beaucoup moins bon sur la partie blogging, 2021 ayant été une année un peu difficile pour moi, je reviendrais peut-être là-dessus dans un autre post.

So, after playing a bit with a scheme for my custodes force (new year, new army got me again....), I decided to do amethyst power weapon inspired by a few representations I saw on Instagram, and by the overwhelming response I received on social media and request for step by step, it seems to be a success!

So here we are with the first tutorial of the year (will there be another one? no idea)!

Comme d’habitude, je me suis fais avoir par le « new year, new army » et n’ayant que très peu de retenu je suis parti sur les custodes en me disant que je n’aurais pas besoin d’en faire 10000. Après quelque recherche sur les réseaux sociaux, je me suis décidé pour des armes énergétiques violettes. Avec le test de base, le résultat sur le blade champion et devant le nombre de demandes, voici le 1er tuto de l’année pour refaire ce type d’effet.

Disclaimer, this is just one way of doing it with amethysty but it is more or less adaptable to any colour you want, just keep in mind different colour may react differently with black and white paint, you could also simplify the way to do it, feel free to experiment!

Comme toujours, ceci n’est que mon approche basée sur ma façon de peindre, il y a surement plein d’autres façon probablement plus rapide de faire quelque chose de similaire. Je suis parti sur une couleur améthyste mais la couleur principale est interchangeable selon vos préférences, gardé en tête que toutes les couleurs ne réagissent pas de la même façon au mélange au blanc et noir.

Paint used:

- Black (which ever you like)
- Amethyst vallejo fantasy pro
- White pro acryl (the best white ever) 

I'll use the blade of an achillus dreadnought for reference as it's pretty big, it's easier to see the process
Les photos proviennent de la lance du dreadnought Achillus qui permet de bien se rendre compte du procédé


1. Just paint the blade black
 On passe la lame en noir pour être propre


2. Time to sketch the general lightning with a mix of white and amethyst, just give a direction to your highlight as this will be smoothed later. I don't dilute the mix to much as you want a good coverage, give it two coats to have a nice and plain highlight
 On sketch rapidement l’effet général de l’éclair pour donner la direction globale avec un mélange de blanc et d’améthyste, je reste assez grossier avec une peinture moyennement diluée afin de bien couvrir, mais 2 passages sur les parties centrales sont nécessaires pour bien couvrir le noir.


3. With white and a tiny bit of amethyst defines the origin of the light source with the paint a bit more diluted, pull the paint toward the light source to leave the pigment at the junction between the blade and the handle

Avec un blanc légèrement cassé à l’améthyste, je viens marquer ma source de lumière en tirant mon pinceau vers la source afin de bien déposé les pigments de blanc sur la jonction lame-poignée 

4. Time to glaze, with pure amethyst diluted, glaze the whole blade just avoid the white source. You'll need to do this a few times. In this case, it took me 3 passes.
C’est le moment d’adoucir les transitions, avec des glacis d’améthyste pure, je viens fondre les éclaircissements avec la base noir en passant sur toute la surface. Plusieurs passages sont nécessaires, dans ce cas, j’ai eu besoin de 3 passages. 

5. Just glaze some white again to bring back the light source if like me you want a bit overboard with the previous step. The bigger the white area, the brighter the light source will appear.
Vu que je me suis un peu emporté avec les glacis, je viens reprendre ma source avec mon blanc cassé, gardé en tête que plus la zone blanche sera grande, plus la source donnera l’impression d’être intense.


6. Fun time, we're going to draw the lightning with white and tiny bit of amethyst, you'll need a nice and pointy brush with a big belly, the paint needs to be well diluted and don't charge too much the brush or you won't be able to control your line. Now it's a good idea to have a reference for the lightning but in a nutshell, connect some tiny lines instead of trying the paint the whole thing in one go. Take your time and try to connect lines where you applied the highlight on step 2     
 
C’est le moment de dessiner les éclairs à l’aide de notre blanc cassé ! La peinture doit être bien dilué et il est important d’avoir un pinceau avec une bonne pointe et un bon réservoir pour pouvoir travailler et contrôler le trait. Ne charger pas trop le pinceau non plus sous peine de faire des amas, testé rapidement sur votre pouce pour avant de vous lancer sur la lame, avoir une référence d’un éclair aide aussi pour reproduire le tracé. Travaillez en petits traits qui se connectent plutôt que d’essayer de le dessiner en une fois et joignez différentes lignes sur les éclaircissements réalisés à l’étape 2


7. To bring everything together, glazed again with amethyst
Un petit glacis d’améthyste pour lier le tout


8.go back with white to highlight the lightning where the line cross or where they meet the edge of the blad, with a few lightnings connecting together on the edge,  this will create a really bright point
Je viens reprendre mes éclairs avec le blanc cassé sur les zones ou plusieurs « branches » se croisent et donner l’effet d’intensité variable dans l’éclair. Je force également le blanc sur les zones touchant le tranchant de la lame.


9. Shade the recess and black line the filigree or details on the blade with black being careful not to go over the previous work
Je viens ombrer les creux et surligner les filigranes avec du noir légèrement dilué en faisant attention à ne pas recouvrir le travail précédent.


10. To finish the blade, highlight the edge with white and tiny, tiny bit of amethyst but instead of doing a straight line try to stipple the edge to give a bit of texture and voilà! (You can see I missed the top edge on the picture, and this has been corrected now) you can add a bit of white to the light source if it's not light enough
Je fini la lame en venant éclaircir les arêtes avec mon blanc cassé, mais au lieu de faire une ligne continue, je viens tapoter mon pinceau pour créer une texture sur ces arêtes et en forçant le trait sur les zones ou l’éclair rejoint le tranchant. Je viens marquer à nouveau ma source pour renforcer l’effet et voilà !

There are a few steps involved but it's pretty quick on basic custodes blade, this weapon is massive and took a bit longer.
Ceci peut sembler fastidieux mais c’est en réalité très rapide sur les petites lames des custodes standard, les armes des dreadnoughts étant particulièrement grandes.

Anyway, enjoy painting and feel free to tag me if you try the tutorial!

N’hésitez pas à essayer avec d’autres couleurs et tager moi si vous essayer le tuto !

Happy painting

David - Anamnesis
14 Apr 2021

[Tutorial] Lost temple base

Hello dear reader(s?),

Long-time no see!
The last blog entry date back from November, so it's been a while.

That was just before I became a father, so that's why I'm a bit busy and to be honest I had no real motivation to write any articles. The global situation and the general tension is getting a bit rough to handle and I find it hard to motivate myself to do anything.

I'm still amazed by the number of people checking the blog though and I'm happy my tutorials are still being used!

Trying to get back in the game and with the requests I received on social media, I made a tutorial on how I painted the base for my latest project, my daughters of khaine.

The idea was to have a something akin to a lost temple environment. I did experiment a bit to find the right balance, but I think this is quite nice while being really easy to do and replicate.
Which is really relaxing after the strain of painting nmm (seriously what the heck was I thinking).

Anyway, here is the result you can expect from this tutorial on my melusai Ironscale.

I’ll be using a simple 25mm base to show you the process.
I haven’t covered how to build  the base but it’s a piece of cork with a juweela concrete tiles on top, which have been weathered with a cutter and brute force, the side and crack are then filed with sandy paste of your choice (dry earth from ak in this instance).

Paint used:

  • S75 Brown leather or Ammo one shot primer brown oxide (good to prime with)
  • Vallejo Japanese uniform
  • Kimera kolors Cloudy sky
  • S75 Sandalwood
  • S75 Nacar
  • S75 Dark forest green
  • Vallejo green olive
  • S75 Autumn green

First step is to cover the whole base with the brown, s75 or ammo, they are very similar

Now as you may know, I love using sponging for bases, as I find it makes wonderful texture. So, grab a piece of sponge and start sponging Japanese uniform on the tiles.

Sponge again cloudy sky this time on the tiles again.


Touch up the sandy part with a bit of brown if you need and drybrush them with sandalwood

Very light drybrush on the sand again with nacar this time

Now for the messy part and to give the greenish tint to the base, we will be working with very diluted paint. I prepare 3 little pool of the 3 greens to have them available and mess around on the fly.

Start making little pool of dark green, then olive and light touch of autumn green, mixing them on the base and leaving them pooling in the recess as needed wanted. Make some pool on the tiles too to represent moss slowly growing on the stone. You can see it still wet on the picture.

Let it dry overnight or just 2 hours if you’re in Australia or somewhere similar. 


The small base and his bigger brother next to each other after a night of drying.

Finish the tiles with additional sponging of cloudy sky, try to be light and don’t cover all the previous work. Paint the rim black and you’re good to add all the grass you want!

I’m using a mix of tufts from rival craft, polak, mininatur of different colours but it’s entirely up to you 😊

I hope you enjoyed this little tutorial and find it useful, let me know if you need more precision in comments or just contact me on my social media

Until next time, take care!

Anamnesis


24 Jun 2020

[Tutoria] Painting white marble

Following the preview pics from last week, I tried to remember to take pictures of the step to paint the marble and I did yeay!
As a quick reminder, here is the back of my tank
Suite à l'article de la semaine passée et suite aux nombreuses demandes sur le marbre, voici enfin un nouveau tuto pour reproduire cette effet!
Pour rappel, voici le dos de l'exorcist.


Keep in mind there is nothing revolutionary here and there are many tutorials online, but this is just my interpretation of the process after failing the baby wipes method to be honest (which left me with tiny hairs all over the surface...). 
I'm still a beginner with the airbrush and my mastery over this tool is fluctuant at best.
Encore une fois, il n'y a rien de révolutionnaire ici étant donner que de nombreux tutoriaux existent sur le net, mais c'est juste ma propre interprétation du processus après un échec avec les lingettes bébés et l'aero qui m'a laissé des petits poils partout sur la surface.
Je ne suis toujours pas au point avec l’aérographe et je ne l'utilise probablement pas suffisamment pour vraiment le maîtriser.

Here a process you can easily recreate with only a brush, and you don't need many colours; as always feel free to experiment with other colours, this is just one example that work with my scheme.
Voici donc un procédé facilement réalisable entièrement au pinceau, les copains sans aero apprécieront ! Comme toujours c'est juste un exemple et un choix de couleurs adaptés à mon schéma, n'hésité pas à expérimenter avec d'autres couleurs!

Without further ado, let's start! 

Paint used for this example: 
Les peintures utilisées:
  • Scale artist Pearl grey
  • Scale artist White
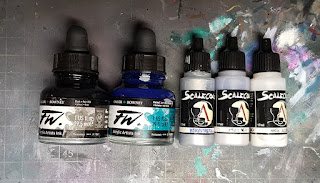
  • Daler & Rowney FW Dark green ink
  • FW Black ink

1. Give it a smooth coat of Pearl grey, it usually required 2 to 3 coats
Je commence par une couche de base de pearl grey en 2-3 passages dilués pour avoir une surface lisse

2. Roughly highlight the upper edge following a zenithal light with a mix of pearl grey and white
J'éclairci rapidement les arêtes supérieurs avec un mélange de peal grey et de blanc, histoire de marquer les volumes.

3. Time to make the veins, with a mix of 3:1 dark green ink to black, I draw random line over the surface changing the pressure on the tip of the brush.
You can use google to give you a reference of marble veins if you need it. 

Don't paint straight line but try to do many curves and edges almost like a little lightning.
We use the transparency of the ink to give depth to the veins, if you want to have darker vein, you can use pure black, lighter use pure green ink, you can also pass twice on vein to make them darker.
For small piece, I usually use just my mix green and black mix, but for example on the big marble piece on the back of the exorcist I used also black and green to have more variation since it is more visible.
C'est le moment de tracer les veines du marbre, avec un mélange de 3:1 de dark green ink et d'encre noire respectivement, je trace des lignes plus ou moins appuyé sur la surface de façon aléatoire.
Ce n'est pas une mauvaise idée d'avoir des images de référence google à coté de soit afin d'aider à réaliser ces veines. 

Ne peignez pas des lignes droites mais essayer de faire des petites vagues et angles un peu comme un éclair.
J'utilise la transparence de l'encre afin d'avoir plus de variations et de profondeurs dans le dessin du marbre, si vous souhaitez des veines plus sombres, n'hésitez pas à utiliser de l'encre noire pure ou la verte pour des veines plus claires, vous pouvez aussi repasser vos lignes pour les assombrir.
Pour les petites pièces, je n'utilise qu'un seul mélange mais typiquement pour le dos de l'exorcist, j'ai utiliser du noir et du vert pour créer plus de variations et d'intérêts à la surface.

4. Optional: Depending on the size of your piece or the effect you want, you can glaze you surface with pearl grey (brush or airbrush if it's a big piece), this will blend the veins with the basecoat then just repeat step 3 and you'll have different depth of veins on surface. I did this on the back of the exorcist because the surface is so big, I wanted to give it more interest, but I haven't done it on the small statue as I find it make it quickly "unreadable".
Optionnel: Dépendant de la taille de la pièce concernée ou de l'effet recherché, je fais un glacis de pearl grey (au pinceau ou aero à choix) afin de fondre les veines avec la couche de base et je répète l'étape n°3 afin de donner plus de profondeurs et d'intérêts à ma surface, ceci va créer des veines avec différents niveaux de lecture et donnera l'impression d'avoir une réelle épaisseur. C'est ce que j'ai fais sur le dos de l'exorcist, mais je ne le fais pas pour les petites statuettes par exemple. Faites attention à ne pas trop en faire, sinon la surface deviens illisible. 

5. It's time to give definition, using the black and green ink mix, I shade the recess and underline all the edges. I also dilute this mix to max a small glaze at the bottom and wherever I judge necessary to have more define volume.
Je viens définir mon volume avec mon mélange d'encre noire et verte, je marque les creux et souligne les arêtes pour faire ressortir les différents éléments. Je donne un petit jus dilué dans ce mélange sur le bas de la figurine et dans certains creux très prononcés pour donner l'illusion d'un éclairage zénithal. 

6. With the mix from step 2 of pearl grey and white diluted, I make a quick edge highlight on the upper edges. Just pick the edge which would receive more light, you don't want to highlight everything.
Avec mon mélange de pearl grey et blanc, je reviens marquer les arêtes supérieurs qui sont les plus exposé sans éclaircir toutes les arêtes toujours dans le but de donner une meilleure lecture du volume.

7. Final step with no picture since I haven't done it yet, is to give a nice coat of gloss varnish and you're done!
L'étape finale (sans image vu que je ne l'ai pas encore fait) est une bonne couche de vernis brillant pour donner le coté brillant si caractéristique du marbre.

I hope you enjoyed this tutorial and I'll see you on the next one.
J'espère que ce tuto vous a plu et je vous dis à la prochaine!

Until next time!
Anamnesis

24 Jan 2020

[Tutorial] True metallic weapon

ANGLAIS - FRANCAIS


Hello again dear people !

It took some times to have all the picture needed but the tutorial for true metallic is finally here! 
De retour pour un nouvel article, on continue dans la série des tutos ceux-ci étant les articles les plus apprécier !

Here a result of this technique applied to the gold and silver.
Voici une idée du résultat de cette technique appliqué ici sur l'or et l'argent.

Anamnesis studio

I know NMM is all the rage now, but I do find a good metallic can be even more challenging due to the way the metallic pigments act. On the other hand, it’s basically NMM with metallic paint so…
Again this is just one way of doing it, with a very strong contrast, feel free to try new colour for fun effect or to dilute the ink if you want a lighter transition. 
Je sais qu'en ce moment la tendance est plutôt au NMM, mais je me suis gentiment rendu compte qu’un joli « vrai » métallique peut être tout aussi difficile à rendre correctement, en partie à cause de la nature ces pigments métalliques et le rendu sur une table de jeu est également super sympa.
Encore une fois ce n’est qu’une proposition de rendu avec un contraste très fort, n’hésitez pas à expérimenter ou changer les couleurs, voir à diluer l’encre pour une résultat plus doux.

Without more ramble let’s dig in! 
Fini le baratin, rentrons dans le vif du sujet !

Paints used:

Anamnesis studio
  • S75 Heavy metal
  • S75 Speed metal
  • S75 White Alchemy
  • Daler & Rowney Marine blue ink
  • Daler & Rowney Black ink

Anamnesis studio
Basecoat everything with heavy metal mixed with a point of blue and black ink, you want a slight blue tint desaturated with the black but not as dark as black metal. 
Ma couche de base est un mélange d’heavy metal avec une pointe d’encre bleu et encore moins de noir, l’idée est d’avoir une base teintée mais légèrement désaturé avec le noir mais pas aussi sombre que le black métal.

Anamnesis studio
Now blend pure heavy metal toward you light point, to give you an idea where to put your light points, I try to have the upper part dark and lighten the bottom part since the edge highlight will create a strong contrast and interested.
Another way to find where to put your light is to just put your mini under a direct light and observe where the light panel receive more light. 
On commence le travail de dégradé avec du heavy metal pure, l’idée de faire une transition en douceur vers notre point de lumière. En général, je garde mon point supérieur sombre pour créer un contraste avec les arêtes éclaircis, je tire donc ma peinture vers le bas.
Un autre moyen de définir ou poser ces lumières est de simplement mettre votre figurine sous une lampe et d’observer les zones qui reçoivent cette lumière.


Anamnesis studio
Continue blending with speed metal covering a smaller part than last step. 
Je recommence à éclaircir avec du speed metal cette fois en travaillant sur une zone plus petite que la précédente.

Anamnesis studio
Time for shading now, using pure marine blue ink, I put a dot in my deepest corner and blend on the go using the loaded brush technique. If you don’t feel comfortable using this technique, just paint the corner with ink and with a clean brush, blend the transition between the ink and the metal.
The ink takes a bit more time to dry, you should have time to work it out, just remember to leave some of the base tone visible. 
C’est le moment de commencer à travailler les ombres, je prends une pointe d’encre bleu que je dégrade dans le frais en utilisant la technique du loaded brush pour plus de rapidité (et aussi parce que je suis fainéant). Pour ceux qui ne se sente pas à l’aise avec cette technique, il est possible de peindre le coin choisi avec de l’encre et pendant que la peinture est encore fraîche, venir assouplir la transition avec un pinceau humide avec de créer le dégradé, l’encre prenant un peu plus de temps à sécher que la peinture acrylique.
N’oublier pas de laisser apparaitre une partie de la couche de base pour avoir une jolie transition.


Anamnesis studio
Shade the darkest corner using black ink, I am again using the loaded brush to do it quicker but, another easy way to do it is to dampen the part you want darker and add a tiny bit of ink in the corner, the ink should blend itself with the water on the support to give you a quick and easy blend. 
Je recommence mon loaded brush avec de l’encre noir dans le coin le plus sombre de ma zone. Une façon de traiter cette étape est d’humidifier la zone de peinture et de venir mettre une pointe d’encre sur le coin choisi, si cela se diffuse trop, il est possible de venir adoucir la transition avec un pinceau légèrement humide.

Anamnesis studio
Using white alchemy, I pick up all the edge to give more definition to the shape of the weapon
Je fini mon arme en venant éclaircir toutes les arêtes avec du white alchemy pour venir marquer mes volumes.

Anamnesis studio
Bonus step: even on true metallic, I really like adding a few scratches to make it more interesting, in this case, I make marks with black paint (and not black ink, you want to cover the metal pigment) and just underline it with white alchemy. 
Etape bonus : même sur les peintures métalliques, j’adore ajouter des éraflures pour rendre la peinture un peu plus « vivante ». Dans ce cas, j’utilise de la peinture noire (et non pas de l’encre, le but étant d’avoir une éraflure matte qui recouvre les pigments brillants) pour réaliser les marques que je viens souligner avec du white alchemy toujours en allant un peu plus loin que ma marque noire.

There you go! Enjoy and let me know if you like this technique on Twitter or Instagram !
Et voilà le résultat, n’hésitez pas à me faire vos retours sur cette technique sur Instagram ou Twitter

Until next time,

Anamnesis

20 Dec 2019

[Tutorial] Stormcast snowy base


Hello again!

So, this will probably be the last article this year, a few people were curious about my snowy base on my stormcast so here is a new tutorial similar to the nighthaunt one I did a few months ago (link at the end of this post), how time flies!
Voici donc le dernier article de l’année, plusieurs personnes étaient curieuses sur mes socles de stormcast, voici donc un tuto similaire à celui des nighthaunt sur des socles enneigés (lien en fin d'article).

Nothing too fancy, Stormcast are already quite tall and I didn't want to add height with cork or something similar (except for heroes and monster, you may see it next year...), so the base is simple to prepare and quick. 
Rien de très spécial, l’objectif était de faire des socles simples et rapides et ne pas trop les surélever vu la taille des stormcast.

Anamnesis studio

What you need – le matos:

  • Sand paper / papier de verre
  • Some base / des socles
  • Few pieces of slate or pine bark / des morceaux d’écorces ou d’ardoises
  • Some snow, I really like Krycell precision ice and snow (find my full review here) / de la neige, je suis très partial sur neige de chez Krycell pour son résultat (le test complet ici)
  • Resin, I’m using uv resin because it’s faster, but normal resin or even a few layers of pva glue should do the trick / de la résine, j’utilise la résine uv pour la rapidité, mais de la résine normale ou même de la colle blanche fais l’affaire
  • Sand and dirt / du sable et de la terre


Anamnesis studio
I won’t go too much into detail for the preparation, there isn’t much to it and a few steps a quite similar with this tutorial on my nighthaunt base.
In short, sand the base, glue a few pieces of barks or slate, add some sand and dirt around the bark and you’re good to go!
Don’t forget to prime it, the bark sucks up the paint.
Je ne vais pas trop rentrer dans le détail de préparation que vous pouvez retrouver dans le tuto nighthaunt.
Pour faire simple, je ponce le socle, je colle des bouts d’écorce ou ardoise et j’ajoute du sable autour de l’écorce, un petit crâne ou deux et c’est bon ! N'oubliez pas la sous-couche l'écorce absorbe énormément la peinture.
 Anamnesis studio

Now we’re ready to paint it! 

Passons à la peinture!


As you may have found if you follow my tutorials, I really like using a sponge for texturing, this one is no different.
Dans la continuité de mes autres tutos, j’utilise beaucoup des éponges pour faire mes textures.

Paint used / peintures utilisées:

  • Kimera Kolors Magenta
  • KK Phtalo green
  • KK White
  • Liquitex magenta quinacridone ink
  • Vallejo Dark sea blue
  • S75 Caspian blue
  • S75 Artic blue

 Anamnesis studio

After the black primer step, I take some magenta and sponge it around the bark pieces to colour where the ice will be, trying to leave some black spots for the next colour.
Après la sous couche noir, j’utilise l’éponge trempé dans du magenta pour marquer les zones de glace, je laisse intentionnellement des parties noires pour la seconde couleur.
 Anamnesis studio

When it’s still wet and without cleaning the sponge, I take some white and sponge on my magenta to create a lighter tone.
Quand c’est encore humide et sans rincer l’éponge, j’utilise un peu de blanc pour venir éclaircir le magenta.
Anamnesis studioAnamnesis studio

I repeat this process, with phtalo green then white on the part I left black to create variety.
The mix between magenta and green result in a nice blue-purple tone.
Je recommence le processus avec du phtalo green puis du blanc pour venir créer de la variété, le mélange des deux teintes crée un joli violet pâle.
Anamnesis studio
Anamnesis studio


Base the bark and sand with dark sea blue.
L’écorce et le sable reçoivent une couche de dark sea blue.
Anamnesis studio

Drybrush the rock with Caspian blue.
Le caillou est brossé à sec avec du caspian blue.
 Anamnesis studio

Again, with artic blue.
On recommence avec de l’artic blue cette fois.
Anamnesis studio

And finish with a light drybrush of white.
Et je fini avec un léger brossage à sec de blanc.
Anamnesis studio

To bring back vibrancy, I glazed magenta and phtalo green on the ice part.
Paint the rime and the few bits added and you’re ready for the resin.
Pour forcer le contraste, je fais des glacis de magenta et vert sur les parties glacées.
Je peins les bords du socle et les petits bits supplémentaires, et le socle est prêt pour la résine.
Anamnesis studio

Using uv resin, I add a few droplets of magenta ink to tint the resin but keeping is transparent.
Apply the resin on the flat part and use a uv torch to dry it.
Je mélange une pointe d’encre magenta à ma résine uv pour la teinter légèrement et je la répartis sur les zones plates du socle. Je la fais durcir à l’aide d’une lampe uv.
Anamnesis studioAnamnesis studio

When I properly cured, gently drybrush pure white on the ice, to make it frosted.
Quand la résine est bien sèche, je fais un léger brossage à sec de blanc pour créer l’effet de givre qui donne de la profondeur.
Anamnesis studio

You can leave it as it is, or you can add snow and a few tufts to finish it. I won’t go again on the process, but you can find all the step necessary here!
Vous pouvez laisser le socle comme ça ou ajouter de la neige ou même des touffes d'herbes, je ne décris pas le procéder plus en détail mais vous pouvez le retrouver ici !
  
Joyeuses fêtes à tous !
Cheers and happy holidays!
Anamnesis