Showing posts with label primaris. Show all posts

10 May 2019

[Showcase] Primaris Librarian and Inceptors squad

Hello dear readers,

It has been some times since my last post, I wasn't very inspired to write so I wrote nothing…
Even in this state, the blog received quite a few visits daily since we’re closing on 50’000 visits!
So, thank you for your interested!

Just to be clear, I haven’t stop painting, but I’ve been building a lot of stuff, meaning I had nothing to show really.

My head is a bit all over the place between the conversion I have in mind, what I’m painting and what I’m planning, but I’m hoping to write some article on a few conversions I have in mind.

Since it will be the first of this kind, I’ll gauge the interest with the visit the article receives 😊

It’s time to show you my latest entry for my Knights of the Chalice army, first here is my second HQ and I should finally be able to deny the witch to my friend master of possession (I’m not annoyed, not at all…)

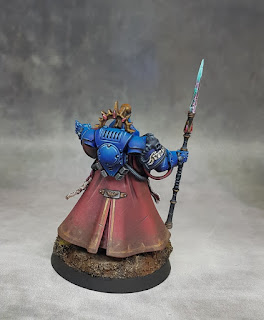
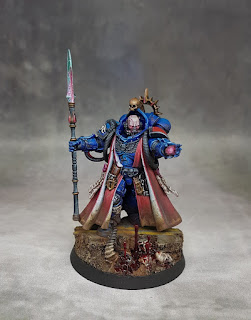
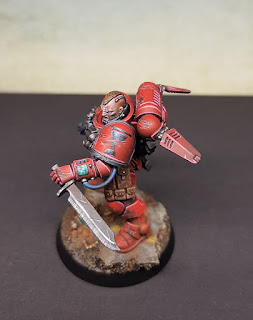
Here is brother epistolary Ymael, attached to the second company of the Knights

Anamnesis studio
Anamnesis studio
Anamnesis studio
Anamnesis studio
Anamnesis studio
Anamnesis studio
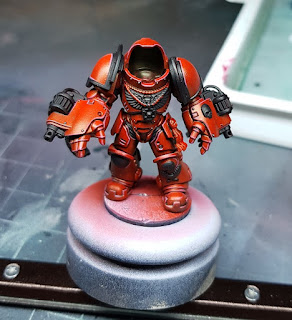
I had to come up with an (almost) completely new scheme for this guy, librarians are usually blue, but I choose to paint the cloak red to be reminiscent of the rest of the army, I’ll do the same for my future chaplain and apothecary. Really happy with the result. 

I had some fun doing some freehand around the cloak before hiding it behind the weathering… yeay!
I didn’t know what to paint on the knee pad, I settled on the rank and quickly painted a little half skull on it. Job done! 

Since the spear is a force weapon, I wanted to have a different kind of glow than the usual power weapon, went for a reddish/pinkish tone with the power coming from the shaft, hence the white glow at the bottom.
The glowing eyes and hand were also something new, I let you judge if it’s successful or not.

Latest addition was the little special effect on the base, after reading Mephiston book and the description of the different spells, I tried to replicate the use of the blood of the enemies to power my librarian.
The blood going up is a mix of brass wire and fishing line with a drop of glue at the top, covered with blood for the blood god from gw, a hole was pierced on the base to hold the wire better.

For those curious, the weapon is from conversionworld.de, they have a very nice selection of weapons for the different legion the cast are very crisp and the guy running the shop is very friendly!

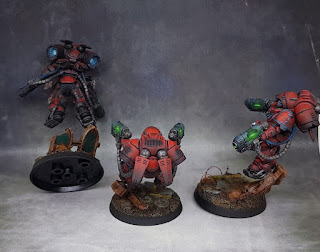
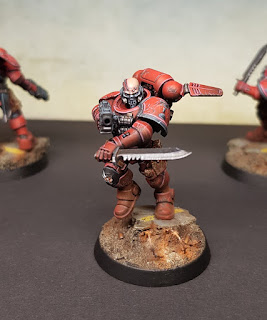
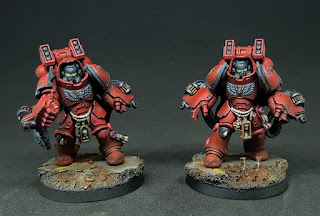
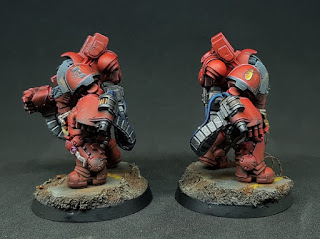
Next up is the inceptors squad Erasmos!

I really like this kit though one of the members has a really strange position.
No conversion on this squad, I just made some higher base to get rid of those horrible transparent holders.

Anamnesis studio
Anamnesis studio
Anamnesis studio
Anamnesis studio

Painting wise, it’s probably not my best squad, I had some troubles doing the right zenithally light regarding the position of the miniatures but at least they done.
The sooth was made by dry-brushing black paint around the exhaust.
Oh yes, you can’t see them, but I still painted the exhaust with a plasma effect, the little details…

And that’s all for today!

Next up on the painting queue is the redemptor dreadnought as requested by my follower on Instagram, then we’ll see! Some tutorials are also in the pipeline.
The resurgence of Sylvaneth is gaining my interested more and more, you may see some news on this front, who knows!

Thanks for reading and as usual you can follow my progress on twitter and Instagram link on the side of this page!

Until next time…

Anamnesis

29 Mar 2019

[Tutorial] Plasma effect and osl

Alrighty another week (or two...) and I finally have all the pictures for the tutorial on the plasma.
I had to change slightly the effect going from the huge plasma of the Astraeus to the small guns of the inceptor, but anyway it's here in the end!

Une nouvelle semaine et un nouvel article, ou presque… Ayant toutes les photos nécessaires, il était temps d’écrire l’article sur le plasma et son osl ayant reçu plusieurs demandes à ce sujet ! J’ai dû l’adapter légèrement pour les inceptors par rapport aux immenses plasmas de l’Astraeus mais le principe est le même.

N.B. I'm using an airbrush for the osl (object source lightning) to make it quicker, but I also possible to do it by hand. Just do some light glaze and you'll have the same effect.

N.B. J’utilise un aérographe pour faire l’osl rapidement sur ces figs, il est tout à fait possible de le faire au pinceau en utilisant des glacis.

Paint used / Peintures utilisées:
Anamnesis studio

  • Vallejo Black
  • Vallejo Dark sea blue
  • S75 Irati green
  • S75 Goblin flesh
  • Schmincke white

Anamnesis studio
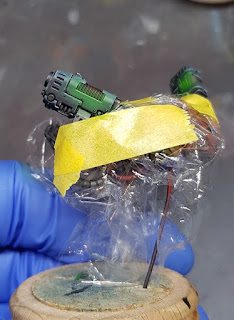
1. I started by doing the airbrush for the osl, since I don't really trust my skill to not mess up the plasma if I did the osl after painting. for I protected the main armour and went on to spray light some irati green around the gun plasma chamber, also hitting her bottom point where the main light will be.
J’ai commencé par l’osl à l’aéro, n’ayant absolument pas confiance en mes capacités à ne pas tous foutre en l’air si je fais cette étape à la fin. J’ai donc soigneusement protégé le travail déjà effectué avant de sprayer délicatement de l’irati green sur la bordure de la chambre à plasma et sur sa base où ou est prévu mon point lumineux.

Anamnesis studio
2. To finish the osl, I spray goblin flesh on the main point of heat of the plasma, in this case the middle. here it is just after taking of the protection.
Pour finir l’osl, je spray du goblin flesh uniquement en dessous de mon point lumineux du plasma. On retire les protections et on peut continuer au pinceau !

Anamnesis studio
3. Time to take you're brush! I'm painting the chamber with a mix of irati green and dark sea blue, trying to leave the bottom part in irati green where my light will be the brightest.
Je peins la chambre avec un mélange d’irati et de dark sea blue en essayant de laisser le point lumineux réalisé à l’aérographe.

Anamnesis studio
4.Using black, I do a light drybrush on the top part furthest from the light point, I'm not too worried about the transition, we will take care on this on the next step.
Avec du noir, je fais un léger brossage à sec sur la partie haute. Je ne me soucis pas trop de la transition, ceci sera repris dans la prochaine étape.

Anamnesis studio
5. Using dark sea blue, I lightly drybrush the transition between the black and green base.
Avec du dark sea blue, je viens faire reprendre ma transition en faisant un léger brossage entre le vert et noir.

Anamnesis studio
6. Sorry for the blurry pic... in this step, I took some irati green and repainted between the black line on the top  to give some contrast.
Désolé pour cette photo floue… Je reprends mon irati green pour venir marquer le creux des sillons sur la partie haute afin d’augmenter le contraste.

Anamnesis studio
7. Using irati green again, I touched up the main light around the centre of the chamber with diluted paint, I should slowly creep up the main channel of the plasma (don't have too much water of the brush otherwise it will run all over the channel!), I also painted the bottom part of the mouth of the gun with the same colour.
Je continue avec l’irati pour reprendre ma source lumineuse avec de la peinture dilué que je laisse travailler par capillarité. Attention à ne pas avoir trop d’eau sinon la peinture va remonter partout. J’en profite pour peindre la partie basse de la bouche du canon avec la même couleur.

Anamnesis studio
8. We're starting to see the effect take shape! With goblin flesh, I push the light on the source of the plasma, I'm again using diluted paint to put a small drop in the middle and let it work its way up around the channel.
L’effet commence à prendre forme ! Avec du goblin flesh, je pousse la lumière sur mon point central toujours avec ma peinture diluée et en laissant jouer la capillarité.

Anamnesis studio
9. To finish the effect, I apply one last highlight using goblin flesh mixed with white, keeping it small and in the middle of the heat point.
Je fini l’effet en travaillant une petite goutte de goblin flesh mélangé à du blanc pour le point chaud du plasma.

And voila! Again, this may seem like a lot of steps, but it's actually really fast since the surface is so small.
Et voilà ! Cela peut sembler un grand nombre d'étapes, mais en réalité c'est très rapide vu la taille de la pièce.

I hope you've enjoyed it and find it useful, don't hesitate to leave a comment!
J'espère que vous trouverez ce petit tuto utile, n'hésitez pas à commenter!

You can find my t-shirts, phone case and stuff on Redbubble!
Vous pouvez retrouver mes t-shirts, protection de portable et autres sur Redbubble !

Until next time!
Anamnesis

18 Feb 2019

[Knight of the Chalice] Reiver squad

So, I've finally painted my reiver squad and I can now claim to have a 1000pts fully painted army!

Took me about 3 weeks to paint them, which is the fastest unit I've done so far. Kinda feel strange to have them done so fast and still they look better than my other unit, oh well, I must be getting use to paint red dudes.
Considering the paint job, nothing new it's still the same recipe, the only thing I did differently is that I've change my usual black lining to do it with oil instead of acrylic, which same quite a bit of time!

Nouvelle année, nouvelle escouade ! Voici donc les reivers qui terminent mes 1000pts pour une armée entièrement peinte pour la 1ère fois ! #champagne 

Ils m'ont pris un peu moins de 3 semaines de peinture, ce qui est un record pour moi, le résultat est également mieux que les anciens, ce qui me dérange légèrement mais bon...
On reste dans les techniques habituelles, rien de nouveau si ce n'est le changement pour un black lining à l'huile plutôt qu'à l’acrylique, ce qui me permet de gagner un peu de temps.


Anyway, without further ado, here is squad Lemael in its full glory.

Voici donc l'escouade Lemael dans toute sa gloire !
Anamnesis studio
Anamnesis studio
Anamnesis studio
Anamnesis studio

Anamnesis studio
Anamnesis studio
Anamnesis studio
Anamnesis studio
Anamnesis studio


Coming next, another foray in AoS with a Sylvaneth project being I'm bit underwhelm by my nighthaunt, a few tutorials to go with it, since I've already been asked on social media, sneak peek.

A venir, un projet Sylvaneth un peu différent pour AoS étant un peu déçu par mes nighthaunts, accompagné des tutoriels déjà demandé sur les réseaux sociaux pour ceux qui me suivent, voici donc un petit aperçu. 

Anamnesis studio
And the base reworked after receiving my order !


For the curious , you can find my t-shirt inspired by 40k here !

Pour les curieux qui le souhaitent, vous pouvez retrouver mes t-shirts 40k ici!

Anamnesis

14 Jan 2019

[Showcase] Astraeus super-heavy tank forgeworld

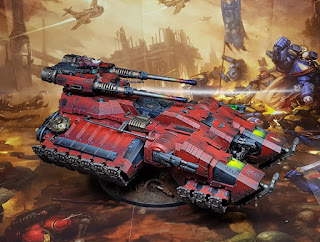
Alright, it's finally time to post what took me the last 3 months to paint (only to paint, I'm not counting the cleaning and building time...)

I've finished this big guy over the week-end and I can say that's been the most exhausting project I've done so far.

I'm really happy with the result, some things might still be better but considering the size of this thing, just to finish building and painting it, is an achievement in itself.

Being forgeworld mean you need to take your time playing with resin, massive mould line and bad joint, the result is very impressive but goodness me, this thing is heavy. It almost flipped the glass shelf in the cabinet! Beware!

Building the kit, you can clearly see it's one of the newly cad design, a good kit not too bad to build, though the amount of grav-plates and cleaning required for them can be off-putting.

Oh, and keep in mind, if you add a gunner or techmarine, you won't be able to have the trap lying flat on the side, it will touch the side weapon otherwise and you'll have to keep it slightly open (been there, done that...)

The painting was mostly straight forward, you can find most on the recipe used on this blog, I had a few setbacks with the gold and the void shield but settled for an old gold in the end.
The thrusters were granted a small ionic effect, similar to the void shield which is many small globes of lightning, the osl for the light is a bit strong.
Most of the weathering is a mix of oil and acrylic, I don't usually use oil but on this kind of surface, it's way easier to control the result.
I also had to come up with a colour for the plasma; I settled for green, which give a nice contrast with the red, a tutorial is planned for the next unit with plasma, which will be the inceptor.

As usual if you're interested in tutorial on other part of the model, feel free to ask in comment.
Seeing the result, I now find my repulsor a bit boring though 😅

A small description/fiction to go along, something I always wanted to try, let me know what you think!

"Gifted to the second company of the Knight of the Chalice during the relentless time of the Indomitus crusade, the Astraeus Celaeno has been the back bone of many frontal assault and a strong asset in the hand of Captain Artemis Beshop.

Deployed from orbit and protected by her void shields, she opened the path to many deployments of reivers and inceptors, creating opportunity moving straight for the enemy; a temperament strangely reminiscent of the company's captain.

Since her first induction during the 21st year of the crusade, Celaeno has been a paragon of war for nearly a century. It's last sighting has been in the Vigilus sector of Dontoria fighting the ruinous power of the death guard."


*Side note, excuse the font, I had nothing big enough to accommodate this tank. Say hi to Vigilus!

Astraeus Celaeno

Anamnesis studio
Anamnesis studio
Anamnesis studio
Anamnesis studio
Anamnesis studio
Anamnesis studio
Anamnesis studio
Anamnesis studio
Had some fun doing this heat effect!
Anamnesis studio
"Bring me closer, I want to hit them with my fingers"
Anamnesis studio
I had a simple drop in mind but I went a bit overboard in the end
Anamnesis studio
When you say "strong" osl...
Anamnesis studio
Void shield lightning
Anamnesis studio
You can't see it on the previous pictures but the techmarine has a little screen thingy
I'll be happy to work again on something smaller in scale (and lighter!); after putting her in the cabinet, I feel my workspace in enormous. 

Anamnesis studio
The state of the army in the cabinet, quite a few red dudes
And that's all for today, thank you for your interested and see you next time!

Anamnesis

31 Aug 2018

[Tutorial/Showcase] Primaris Aggressor - Red tutorial

Following last week article, it's time to present my latest unit for my primaris army which clock them just under 1000points!

Doesn't seem much but I never add more than a squad and half painted for each army for many years, so it's quite a milestone for me :)

A few pointers concerning the kit, it's possible to build them almost completely and keep the head separate for ease of painting, you just need to cut the little peg under the head, so you can tuck them in their little hood.

Keep the ammunition feed in two pieces was a mistake, glue both side and then glue them in, I didn't glue to backpack to make it easier to paint.

Apart from theses littles things, the kit is really nice with a few options, cleaning the mould line on all the cables was a massive pain though.

Without further ado, here is the result!

[Français] Et voilà, la finalisation de mes 1000pts de primaris (à 25pts près), la dernière escouade en date avec ces aggressors qui représente la garde rapprochée de mon capitaine et qui l'accompagne dans le repulsor. 

Jolie kit avec un certain nombres d'options; pour ceux qui se demandent, il est possible de monter l'ensemble de l'armure et de garder la tête à part, il suffit de couper le petit pivot sous la tête, il est possible de la glisser dans la zone réservée après peinture.
Évitez de garder les chaines de munitions en deux parties, c'est une erreur que j'ai fait ce qui a rendu le collage final plus qu'ennuyeux....

Knight of the Chalice aggressors squad


Space marines primaris aggressors

Before painting to give you an idea of the different parts, no heads, no backpacks.

Space marines primaris aggressors
Oh, if you're wondering why I have squad of 4, I had a pretty big miscast on my original box and gw was kind enough to send me a new one, kudos to them!

Red Tutorial - Tuto sur le rouge

Quite a few people asked me about my recipe for the red, when I choose my scheme, the idea was to have very simple steps to paint it so I could do a whole army this way. 
I put theses littles pictures together to show the process, I don't think the tutorial need to be as precise as the other ones since there's nothing much to it really.

Bon nombres de personnes m'ont demandés la recette pour le rouge, l'idée de base de cette armée était de pouvoir réaliser la couche de base à grande échelle et de façon rapide afin d'imaginer avoir une armée peinte un jour, voici donc un petit tuto rapide sur la façon de procéder pour avoir ce rouge bien flashy. (Pour être honnête, il a été fait avec les images à disposition, il n'est pas forcement aussi bien ficeler que les autres)

Space marines primaris aggressors
1. The first step and what I usually do with all my minis is prime them with chaos black, which is thus far the best basecoat spray for me. 
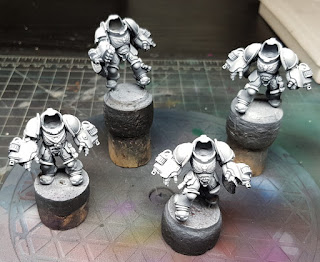
I will use preshading on this mini, this technique can be quite helpful to make the volume pop and give you a rough idea on where to put your highlight.
Give it a zenithal spray with white, to make it more interesting, I also spray with a 30° angle from the top, otherwise the legs will never receive any highlight from the white.

You can use a rattle can or an airbrush, all my intercessor where done using a rattle can and I used the airbrush for my lieutenant and captain, it's really up to you.

La 1ère étape consiste à sous-coucher la figurine en noir, j'utilise le spray gw qui reste pour moi la référence parmi les différents produits testés.

Pour ces figurines, j'utilise la technique du "preshading" (pré assombrissement pour les bons francophones mais ce n'est pas terrible comme termes...), cela consiste à sous-coucher une figurine en noir et appliquer un voile blanc en deuxième couche pour marquer les volumes.

Cette couche pour être appliqué au spray ou à l’aérographe à choix, le résultat à l'aéro sera un peu plus fin mais rien de transcendant non plus, pour référence, les intercessors sont fait à la bombe et les lieutenants et capitaine à l'aéro.
J'applique cette couche de façon zénithal en ajoutant un petit angle de maximum 30° pour donner plus d'intérêt et une meilleure lecture. Petit effet artistique, sinon la tête sera blanche et les jambes noires.

Space marines primaris aggressors
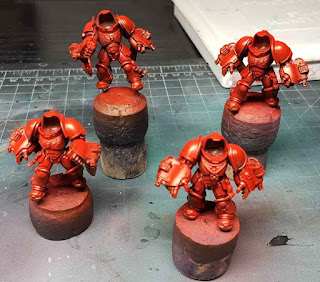
2. For the second step, I use an airbrush to spray the armour with daler & rowney flame red ink which is an acrylic ink. I don't even dilute it, to give you an idea of my laziness...
You just need to give it a few light coats to keep the transition you have between the black and white, the white undercoat will make the red pop. 

You don't need an airbrush for the step, it just faster to do it this way, if you want to do the same thing by hand, you need to do a few diluted coats to keep the original contrast.

Keep in mind that red is heavily dependent on the colour next to it, if you have really bright colours adjacent, it will make it less vibrant.
If everything went correctly, you should have a nice subtle gradient on the red. It's really shiny for the moment but the varnish at end will dull the effect.

La seconde étape, j'utilise l'aérographe pour faire de couches délicates de rouge avec de l'encre acrylique daler & rowner flame red ink, je suis tellement une flemme que je ne la dilue même pas...

L'idée est de faire plusieurs couches fines pour laisser apparaître les transitions et donner un effet de dégradé sans passer des heures à le faire manuellement.
L'aérographe n'est pas une nécessité mais il simplifie le procédé, si vous souhaitez le faire au pinceau, le plus simple est de faire de fines couches diluées jusqu'à atteindre la couleur voulue.

Il intéressant de garder en tête que le rouge est également dépendant des couleurs adjacentes, s'il est entouré de couleurs criardes, celui-ci va se "perdre" dans la masse, entouré de couleurs plus neutre, il va ressortir.
Le résultat est très brillant pour le moment, mais cet effet sera atténué par l'étape final de vernis.

Space marines primaris aggressors
3. To make it easier to read, I painted all the black part in... black (badum); I also use a mix of red ink and black ink to mark all the joints and creases in the armour, the ink being more fluid make it easier to apply.
Easy step, just take your time to not make some marks on the red.

Pour faciliter la lecture et la peinture, je peins tous les parties qui seront noirs en... noir (tadaa); j'utilise un mélange d'encre rouge et d'encre noir pour marquer les creux et joints de l'armure, la fluidité de l'encre facilite cette application.
Prenez votre temps pour cette étape afin de ne pas dépasser sur les parties rouges.

Space marines primaris aggressors
4. Last step is to highlight the edges of the armour panels following the zenithal highlight, I am using a mix of 50/50 red ink and white, that part can be a bit tedious but It really make the armour pop.
Sometimes I do this step in two passes, adding more white and doing smaller line to finish it.
If the transition is to strong, just glaze some red ink to smooth it out.

And boom, flashy red is done!

Les dernières étapes consistent à éclaircir les arêtes de l'armure en suivant la lumière zénithale, j'utilise un mix de 50/50 encre rouge et blanc.
Je fais parfois cette étape en deux fois, si mon mélange est trop foncé, j'ajoute simplement un peu plus de blanc et reprend des éclaircissements plus fins. Si la transition est trop violente ou le mélange trop clair, je fais des petits glacis d'encre rouge pour affiner la transition. C'est probablement l'étape la plus longue, mais c'est celle qui va donner la définition de l'armure et ces contours.

Et voilà, un rouge bien flashy en 4 étapes !

Plusieurs articles sont prévus sur des tests de matos, des présentations (des nighthaunts!) et d'autres tutos, il faut juste que je trouve du temps pour les écrire, ceci me prenant un peu plus temps que ce que j'envisageais à la base. 
N'hésitez pas à me faire part de vos retours et de choses que vous souhaitez discuter !

I have quite a few things planned for the next few articles, showcase (expect to see some nighthaunts!), review and some tutorials, I just need to find the time to write everything, since theses articles take quite some time to write!

Cheers
Anamnesis