Showing posts with label osl. Show all posts

3 Feb 2022

[Tutorial] Lightning power weapon

Sooo I'm not dead, and actually I've been painting quite a lot to be honest, 2021 was a bit of a strange year, but I may get back to it on another post as most of you are not here for this.

De l’activité sur le blog !!! Eh oui je ne suis pas mort, j’ai même été particulièrement actif sur le coté peinture, mais beaucoup moins bon sur la partie blogging, 2021 ayant été une année un peu difficile pour moi, je reviendrais peut-être là-dessus dans un autre post.

So, after playing a bit with a scheme for my custodes force (new year, new army got me again....), I decided to do amethyst power weapon inspired by a few representations I saw on Instagram, and by the overwhelming response I received on social media and request for step by step, it seems to be a success!

So here we are with the first tutorial of the year (will there be another one? no idea)!

Comme d’habitude, je me suis fais avoir par le « new year, new army » et n’ayant que très peu de retenu je suis parti sur les custodes en me disant que je n’aurais pas besoin d’en faire 10000. Après quelque recherche sur les réseaux sociaux, je me suis décidé pour des armes énergétiques violettes. Avec le test de base, le résultat sur le blade champion et devant le nombre de demandes, voici le 1er tuto de l’année pour refaire ce type d’effet.

Disclaimer, this is just one way of doing it with amethysty but it is more or less adaptable to any colour you want, just keep in mind different colour may react differently with black and white paint, you could also simplify the way to do it, feel free to experiment!

Comme toujours, ceci n’est que mon approche basée sur ma façon de peindre, il y a surement plein d’autres façon probablement plus rapide de faire quelque chose de similaire. Je suis parti sur une couleur améthyste mais la couleur principale est interchangeable selon vos préférences, gardé en tête que toutes les couleurs ne réagissent pas de la même façon au mélange au blanc et noir.

Paint used:

- Black (which ever you like)
- Amethyst vallejo fantasy pro
- White pro acryl (the best white ever) 

I'll use the blade of an achillus dreadnought for reference as it's pretty big, it's easier to see the process
Les photos proviennent de la lance du dreadnought Achillus qui permet de bien se rendre compte du procédé


1. Just paint the blade black
 On passe la lame en noir pour être propre


2. Time to sketch the general lightning with a mix of white and amethyst, just give a direction to your highlight as this will be smoothed later. I don't dilute the mix to much as you want a good coverage, give it two coats to have a nice and plain highlight
 On sketch rapidement l’effet général de l’éclair pour donner la direction globale avec un mélange de blanc et d’améthyste, je reste assez grossier avec une peinture moyennement diluée afin de bien couvrir, mais 2 passages sur les parties centrales sont nécessaires pour bien couvrir le noir.


3. With white and a tiny bit of amethyst defines the origin of the light source with the paint a bit more diluted, pull the paint toward the light source to leave the pigment at the junction between the blade and the handle

Avec un blanc légèrement cassé à l’améthyste, je viens marquer ma source de lumière en tirant mon pinceau vers la source afin de bien déposé les pigments de blanc sur la jonction lame-poignée 

4. Time to glaze, with pure amethyst diluted, glaze the whole blade just avoid the white source. You'll need to do this a few times. In this case, it took me 3 passes.
C’est le moment d’adoucir les transitions, avec des glacis d’améthyste pure, je viens fondre les éclaircissements avec la base noir en passant sur toute la surface. Plusieurs passages sont nécessaires, dans ce cas, j’ai eu besoin de 3 passages. 

5. Just glaze some white again to bring back the light source if like me you want a bit overboard with the previous step. The bigger the white area, the brighter the light source will appear.
Vu que je me suis un peu emporté avec les glacis, je viens reprendre ma source avec mon blanc cassé, gardé en tête que plus la zone blanche sera grande, plus la source donnera l’impression d’être intense.


6. Fun time, we're going to draw the lightning with white and tiny bit of amethyst, you'll need a nice and pointy brush with a big belly, the paint needs to be well diluted and don't charge too much the brush or you won't be able to control your line. Now it's a good idea to have a reference for the lightning but in a nutshell, connect some tiny lines instead of trying the paint the whole thing in one go. Take your time and try to connect lines where you applied the highlight on step 2     
 
C’est le moment de dessiner les éclairs à l’aide de notre blanc cassé ! La peinture doit être bien dilué et il est important d’avoir un pinceau avec une bonne pointe et un bon réservoir pour pouvoir travailler et contrôler le trait. Ne charger pas trop le pinceau non plus sous peine de faire des amas, testé rapidement sur votre pouce pour avant de vous lancer sur la lame, avoir une référence d’un éclair aide aussi pour reproduire le tracé. Travaillez en petits traits qui se connectent plutôt que d’essayer de le dessiner en une fois et joignez différentes lignes sur les éclaircissements réalisés à l’étape 2


7. To bring everything together, glazed again with amethyst
Un petit glacis d’améthyste pour lier le tout


8.go back with white to highlight the lightning where the line cross or where they meet the edge of the blad, with a few lightnings connecting together on the edge,  this will create a really bright point
Je viens reprendre mes éclairs avec le blanc cassé sur les zones ou plusieurs « branches » se croisent et donner l’effet d’intensité variable dans l’éclair. Je force également le blanc sur les zones touchant le tranchant de la lame.


9. Shade the recess and black line the filigree or details on the blade with black being careful not to go over the previous work
Je viens ombrer les creux et surligner les filigranes avec du noir légèrement dilué en faisant attention à ne pas recouvrir le travail précédent.


10. To finish the blade, highlight the edge with white and tiny, tiny bit of amethyst but instead of doing a straight line try to stipple the edge to give a bit of texture and voilà! (You can see I missed the top edge on the picture, and this has been corrected now) you can add a bit of white to the light source if it's not light enough
Je fini la lame en venant éclaircir les arêtes avec mon blanc cassé, mais au lieu de faire une ligne continue, je viens tapoter mon pinceau pour créer une texture sur ces arêtes et en forçant le trait sur les zones ou l’éclair rejoint le tranchant. Je viens marquer à nouveau ma source pour renforcer l’effet et voilà !

There are a few steps involved but it's pretty quick on basic custodes blade, this weapon is massive and took a bit longer.
Ceci peut sembler fastidieux mais c’est en réalité très rapide sur les petites lames des custodes standard, les armes des dreadnoughts étant particulièrement grandes.

Anyway, enjoy painting and feel free to tag me if you try the tutorial!

N’hésitez pas à essayer avec d’autres couleurs et tager moi si vous essayer le tuto !

Happy painting

David - Anamnesis

28 Sept 2020

Adepta sororitas exorcist and colours rundown

 A quick article because I never posted the picture of this little tank after the tutorial for the marble, but I did finish it after many, many hours!

Nothing really new on this but as many people requested, is the rundown of the colours used for the different parts:

Main armour:
Base Petroleum grey, highlight Gobi brown, then white sands, pin wash of oil starship filth and pick the edge with white sand

Chipping is rhinox hide

Blue cloth:
Base dark prussian blue, highlight phtalo blue then blue green, finish by adding a touch of white.

Black:
Usual recipe. base with black highlight with dark sea blue then highlight adding white 

Copper:
Decayed metal, wash strong tone, highlight with stippling a mix of pure copper and old copper, finish the edge with moonstone alchemy 

And you should have most of the recipe !


Fun fact, painting closed eyes is actually really hard...

I'll post later this week, an article more focus on my general hobby update and what's happening during those strange times.

Keep safe and happy painting !

Anamnesis


21 Nov 2019

[Showcase] General hobby update and progress

As you may have noticed, the blog was a bit quiet for the last few weeks again, I had a few things planned but I wasn't really in writing mood.
Being frustrated with my Sylvaneth didn't help my hobby mojo either, but anyway you're not here to read my rambling.

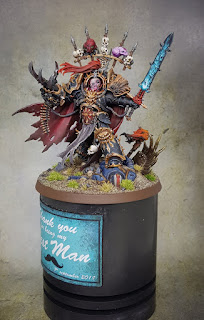
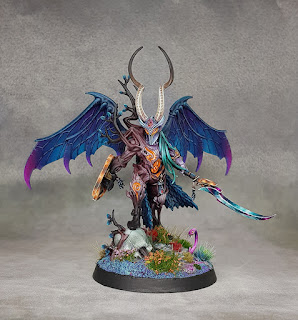
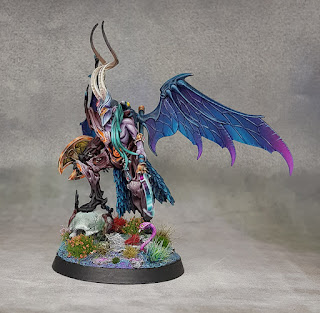
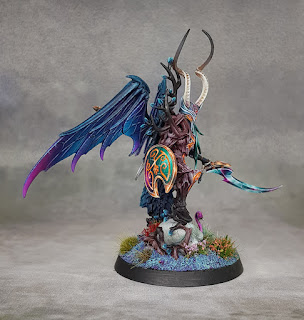
First thing first, here the special project I was working tirelessly before the wedding which was a gift for my best man.

Anamnesis studio
Anamnesis studio
Anamnesis studio
Anamnesis studio
Anamnesis studio
Anamnesis studio
Anamnesis studio
Anamnesis studio

This was a first time doing a label, interesting stuff... For the curious I've been following sprocket small world tutorial, feel free to check it out! Don't expect to see more chaos stuff, this was a one-off 💀
I admit, the kit is quite awesome and very well thought! I was a bit in a rush to paint this big guy, but I still tried to push the painting and respecting my best man painting scheme.

I also had some fun converting a chaplain for my blood angels, we don't really play 40k at the moment, as we are not big fan of the rule and we enjoy AoS more, but I still love my little red marine.
Anamnesis studio

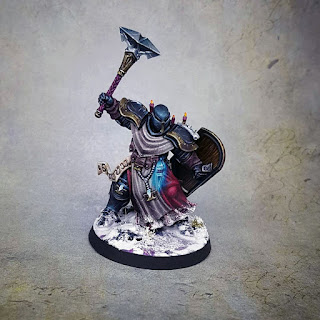
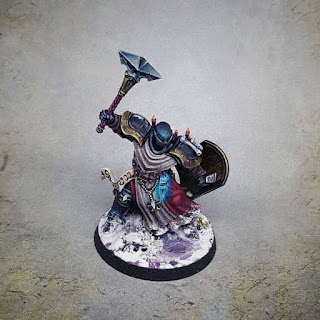
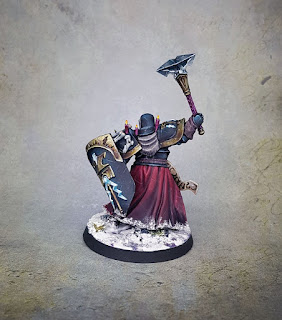
Though the latest news is I acquired a few stormcast and being impressed/inspired/awed by Veillotron army on his twitter account, I wanted to do something similar for a long time.

Pulling inspiration from his conversion, the conversion on blog des kouzs and videogame like dark souls and diablo here the first guy on my version of the Anvil of the Heldenhammer.

Anamnesis studio
Anamnesis studio
Anamnesis studio
Anamnesis studio

The next tutorial in the making is quick one on painting freehand wood as you can see on the inside of the shield. The rest will probably follow as I had a few request on my Twitter or Instagram 😊

And that's all for today!
Until next time
Anamnesis

20 Aug 2019

[Showcase] Everchosen Sylvaneth Arch revenant

Soooo it's been some time since the last article, it has been a rollercoaster of adventure with my everchosen entry and time for writing between the competition and preparation for the wedding was pretty low.

To make it quick:
  • my entry was at first, not valid for the competition,
  • then it was valid again
  • my store decided not to participate two days prior to the deadline because gw left them in the dark with no news whatsoever
  • decided to participate in another store 2h away from home
  • had like two days to finish the mini including the whole bug and the base
  • and to finish it I did drop the mini just before taking photo and it broke in four pieces, that at 1am
So, as I said, not a smooth ride.

But in the end, the mini was finished even if a few parts are clearly rushed and I even managed to win my category on the shop. Thanks again l’Ornithorynque in Neuchatel for accepting me!

I really tried to push myself on this mini, the NMM is probably the most advanced I ever done, the wood veins were drawn all over the place and I even had to sculpt a few pieces to accommodate for the modified pose.

It really is a great model and to be frank, I’m very unhappy with the rushed end, you can clearly see those parts are not on pare with the rest of the model and it bother me to no end.

Starting from massive spike of motivation to finish in frustration, I’m not sure I’ll do anything similar anytime soon.

But enough ramble here are the pictures!

If you enjoy my piece, feel free to vote for it on the Warhammer community website, displayed pictures are random but you may stumble on mine 😊 

Winning entry!

Anamnesis studio

Close-up and different angles

Anamnesis studio
Anamnesis studio
Anamnesis studio
Anamnesis studio
Anamnesis studio
Anamnesis studio

As a small reminder, a full tutorial on the blade is available free on the blog and you can find the step by step for the base, bark and leaves also in their respective links !

Cheers !

Anamnesis

28 Jun 2019

[Showcase] Starting Sylvaneth - Dryads and Branchwych

Hello dear readers!

Busy month and heat mean it has been some time since the last article, but here I am again!
I was planning to redo the design of the blog, but it will come later.

Since I've sold my nighthaunt, I needed a new army for AoS.
I love the sylvaneth aesthetic and the new battle tome announcement plus the arch revenant miniature just convinced me if I ever needed any help. (N.B., I don’t) 

As side note, my mate confidence on painting an army has been boosted with contrast paint, so the new challenge is to finish 1000 points each for age of Sigmar by the end of the year!
Expect to see NMM for this army to keep the organic feel, I’m no Lan, but I’ll try to my best to have a convincing effect.

You saw the first few dryads for testing the scheme on my last two tutorials, the process is still in evolution but it’s getting better and faster.

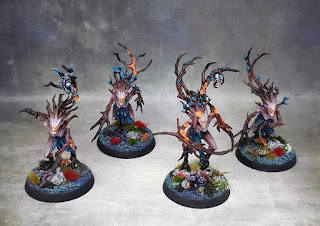
Here is the complet squad for my first entry! 30 are still waiting to be build… few.

Anamnesis studio
Anamnesis studio
Anamnesis studio

And the old batch

Anamnesis studio
Anamnesis studio
Anamnesis studio

Even with the kit being a few years old, I still really enjoy painting them. Cleaning them is another story, removing the mould lines on the branches is a right pain. 
You can play "Spot the difference" between the fresh batch and the last one if you're bored, a few things are different.

Lady of the wood


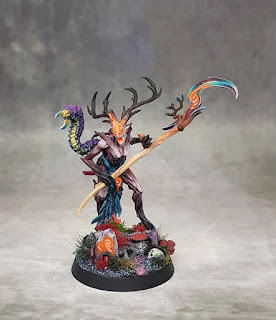
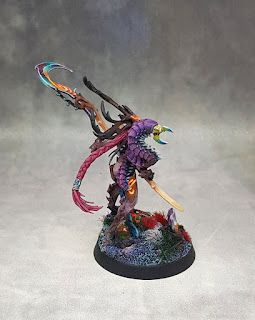
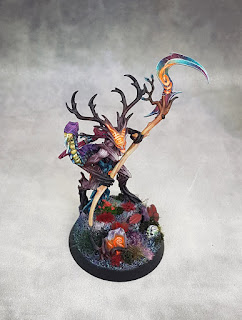
I started the branchwych after the first 5 dryads, choosing to complement my painting scheme proved to be a difficult task to say the least and I’m still fiddling with it. Many things had to be repainted a few times to find something I was happy with. 

I tried to include as many nuances as possible in the blade, to have something magical.
To differentiate the hand of the blade, I painted a softer wood like birch with a warmer tone, which contrast with the black “hands”. Fuchsia was used for the hair just because the paint is really nice, simple choice!
I made a tiny waterfall on the base to see how it worked after seeing something similar on Instagram, inspiration is everywhere!

Anamnesis studio
Anamnesis studio
Anamnesis studio
Anamnesis studio
Anamnesis studio
Anamnesis studio

Not everything worked as I thought but the mini is finished! Mainly, the spite is a bit rough.

Hope you stay with me on the road to painting 1000 points of sylvaneth since it's already mid-year and I need to move quickly now!

So, what’s next in the pipeline?
A tutorial on the blade will be made as requested on social media.
I’m also planning on entering the Everchosen competition with my Arch revenant, an article about painting for “competition” standard and my train of thoughts on the subject will probably be written.
As always, if you have any subject you would like to see, feel free to write them in comment!

Thanks for visiting the blog even with no new article and see you soon-ish!

Anamnesis