And here we go!
A few people we're interested in how I painted my stormcast from the shadespire core box, here is the result of the first mini I've done to give you an idea.I'm planning on doing a step-by-step on most of the part since i took many pictures during the painting of the third guy!
Salut les francophones!
J'ai eu plusieurs retours sur la façon dont j'ai peins le sieur Oberyn de la boite de base shadespire, j'ai profiter de la peinture du dernier du trio pour prendre des photos du process et pouvoir vous livrer un tuto casi complet sur la peinture de la figurine et de ces différents éléments, pour rappel la figurine de référence ci-dessous.Oberyn the bold
Keep in mind this is process I used, it's probably not the best nor the fastest, the idea behind thoses littles guys was to try to push my painting a bit and try some new things.
That's why the result is very colourful (a first for me) and in NMM (first time trying copper btw), which i wouldn't have the patience to do on a full scale army.
I hope you find it interesting and feel free to leave a comment!
Gardez en tête que c'est également un procédé qui a été utilisé sur 3 figurines, certaines choses pourraient être amélioré, c'était l'occasion pour moi d'essayer de nouvelles techniques dont je n'ai pas l'habitude.
Typiquement c'est un premier essai de non métallique cuivré et une première tentative de schéma très coloré où je reste en général plus sobre dans mes teintes.
N’hésitez pas à me faire part de vos retours sur l'article si vous avez aimé ou non!
Part 1 - The armor - L'armure
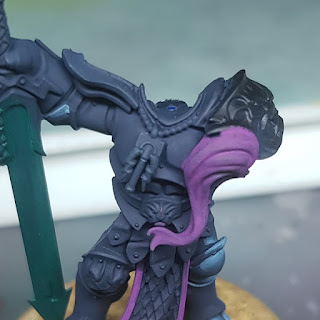
1. First step is the to basecoat everything with deep blue from scalecolor, it's a really dark blue which look almost black; a really good colour to give some interest to your shadow when you paint other colour instead of using just black!
La première étape est de faire une belle couche de base avec du deep blue scalecolor, c'est un bleu très foncé qui paraît presque noir, c'est également une très bonne teinte pour donner un effet particulier à vos ombres si vous ne souhaitez pas utiliser du noir!
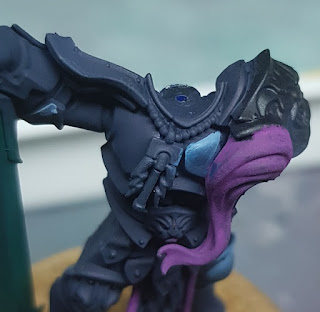
2. Time to build the main highlight, using bering blue, I use the loaded brush technique to try to blend at once the highlight into my base colour.
(The explanation of the technique, which I discovered with Ben Komets, more in details and very well explained is available here )
I choose to have a simple zenithal light, so the majority of the time, the highlight is on the top part of the armor.
Je commence à développer mon premier éclaircissent avec du bering blue, j'utilise la technique du "loaded brush" que j'ai découverte par Ben Komets ( une explication en détail et très complète de cette technique est disponible en anglais ici ).
J'ai pris le parti d'avoir une simple lumière zénithale pour les éclaircissements.
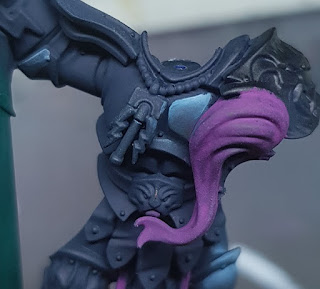
3. I finish the main highlight by adding a tiny bit of white to my bering blue and do i smaller highlight using the loaded brush again.
I usually smooth my blend if it's a bit to rough by glazing my basecoat pulling the brush from the light to the shadow.
I also blend a little bit of black toward the bottom of the pectoral for the darkest shade.
Je fini l'éclaircissement de ma surface principale en ajoutant une pointe de blanc à mon bering blue et j'utilise le "loaded brush" à nouveau.
Je profite également de cette étape pour corriger mes transitions si je n'en suis pas content, en général en reprenant ma couleur de base et en tirant un glacis partant de la partie claire à la partie foncée.
Du noir a été passé en glacis dans la partie base de la plaque pectorale pour terminer la transition et renforcé le contraste de cette plaque.
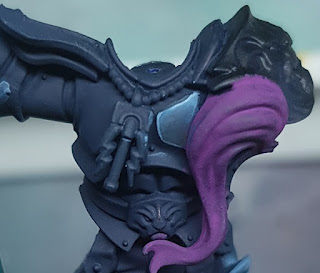
4. I define my surface by painting the edge all around my surface with my mix of bering blue and white.
When doing edge, you can use the point of your brush if the edge isn't really well define, otherwise just use the side of your brush and drag it along the border to leave a fine line without the hassle.
Je défini le contour de ma surface en utilisant mon mélange de blanc et bering blue pour dessiner un trait très fin sur l'ensemble du périmètre.
Pour les bordures, si celle-ci sont bien défini vous pouvez passer avec le coté de votre pinceau plutôt que la pointe, c'est plus facile et plus rapide.
Si ce n'est pas possible, il faut suivre l'arête avec la pointe de votre pinceau du mieux possible et corriger les petits écarts après coup le cas échéant.
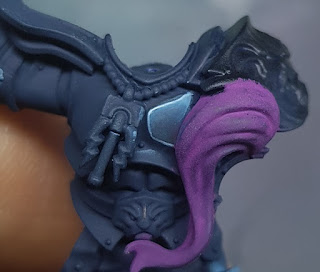
5. I do my final highlight using white to highlight the top part of my edge and give the final definition to the surface.
Je fini mon éclaircissement en utilisant du blanc pour marquer la partie supérieur de mon arête. C'est cette dernière étape qui va donner l'impression de brillance de l'armure et marquer sa définition.
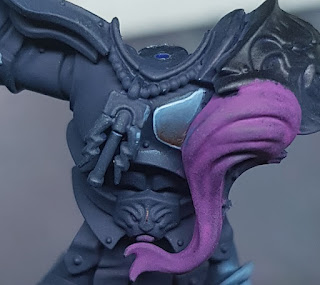
6. To finish the effect and give some interest to the shade, i glaze tindalos red toward the bottom part of the pectoral plate.
La dernière étape consiste à faire un glacis de tindalos red dans les ombres les plus profondes afin de les rendre plus intéressantes et donner une variation dans les teintes.
As you can read the paint palette is quite limited and make it easy to correct mistake along the way !
Comme vous avez pu le lire, les couleurs utilisées sont limités ce qui permet de corriger les erreurs de façon relativement facile.
In the next article, I'll cover the jade sword.
Dans le prochain article, je décrirai la peinture de l'épée de jade.
Anamnesis


Thanks for this, its a pretty simple way of getting smooth highlights on armoured models. I enjoy your tutorials greatly
ReplyDelete